After eleven years of permitting, I finally received a FERC waiver and a special use permit from the USFS and so began construction this fall on my micro-hydro project. This entire project construction took just two weeks. Briefly, the paperwork was identical to that of Hoover Dam–I’m serious. Or Grand Coulee Dam. For those interested in creating such a source of power here in Alaska, read on.
You must consider that any water that falls from the sky or runs down a hillside belongs to the State of Alaska so the Department of Natural Resources must be consulted and a permit issued. The ground that the water runs over and upon which the penstock must be built, in my case, was on federal land owned by the USFS and that requires a one-time fee and an annual special use permit. Any electric power produced on federal land must apply through FERC (Federal Energy Regulatory Commission) or get a FERC waiver. At first, by simply mentioning blockage or “dam” in any creek kicks off the FERC process.
I am FERC Docket # P-14862 at the government’s eLibrary. All my hundreds of pages of documents can be found there. I won’t bore you with details–you won’t have the patience to read them all anyway–but after about 7 years, three of which simply gave up, I was prompted to apply for a FERC waiver and use an in-stream water capture system which is described at the end of this post.
From that point on, it actually went pretty smooth. And I will state from the very beginning, that everyone I worked with on this project–from my FERC advisors (I went through three) to the government employees here in Petersburg (and in Juneau, Seattle and Washington DC, (there were about 13 federal and state agencies I worked with), including an attorney “fan” who followed me for all 11 years in Washington DC; everyone was very, very helpful and supportive.
I am currently working with Lisa Murkowski’s office to streamline this process into a 3-6 months process through a one portal application for 5KW and less, non-connected to the grid and removable infrastructure. Stay tuned for that blog…..
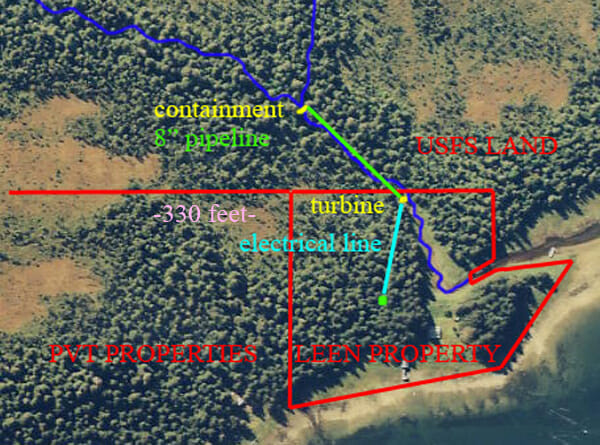
If you have the patience to stick with me, you will learn everything to put in a system of your own. This aerial shows my 10 acres in red, the creek in blue and the penstock route in light green–although it’s not that straight. Every hydro application is different–principally in volume of water and height of head pressure. I’m a low head/high volume type of application and will use a simple “overshot” wheel designed by Scott–to be introduced later. High head/low volume systems usually utilize a Pelton wheel. This blog post applies to low head/high volume.
I began this project in 2009 realizing my creek was putting out up to 30,000 gallons/minute during the rainy periods. Meanwhile I’ve been schlepping about 350 gallons of diesel a year–or about a gallon/day–to keep the power on here. Mostly it’s stored in batteries (I’m on my fourth set) most recently a 48VDC Discover battery which is a Lithium-Iron-Phosphate sealed unit which is the same technology as Tesla and the 787 Dreamliner. I installed solar about 10 years ago and can get up to 9KW in a 24 hour cycle but I don’t live in Southern Arizona–I live in a rainforest. This past August, we received 21″ of rain in that month alone which means not much solar. It’s time to put in some penstock and harvest some of this ‘Manna from Heaven’…..
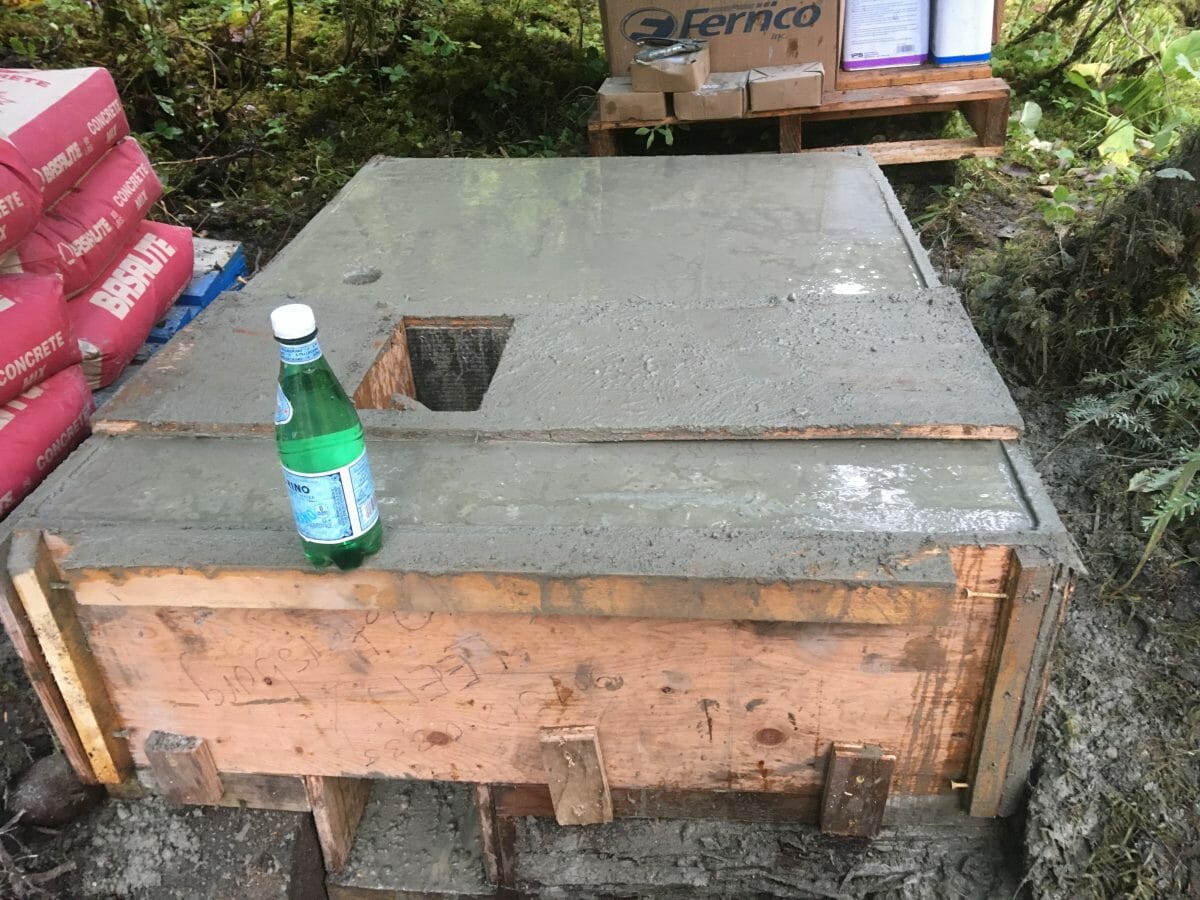 The first step, while waiting for my final permits and with fall approaching, I build a concrete foundation and spillway. I’ll take water out of my creek (on USFS property uphill) and pipe it downhill for 458′ from two intakes–the stream forks but I decided to capture water higher up for ease of escaping the creek banks and to obtain more head pressure–25′ in all (this is a high volume/low head application). The spillway is the square hole which exits at the bottom. It’s three times the cross section of the 6″ pipe. The round hole is for a wire feed–three phase. The wire (3-#6) runs nearly 500′–all underground–to my well house where the inverter and batteries are kept. This structure is right on the edge of my property.
 I order 28 sticks of 20′ length schedule 40 Charlotte bell-end pipe and Puget Sound Pipe gets it here on time in spite of forest fires throughout the West Coast and the Covid Pandemic. I personally want to thank Aaron Austin there who should be promoted to CEO. You’re the man, Aaron.
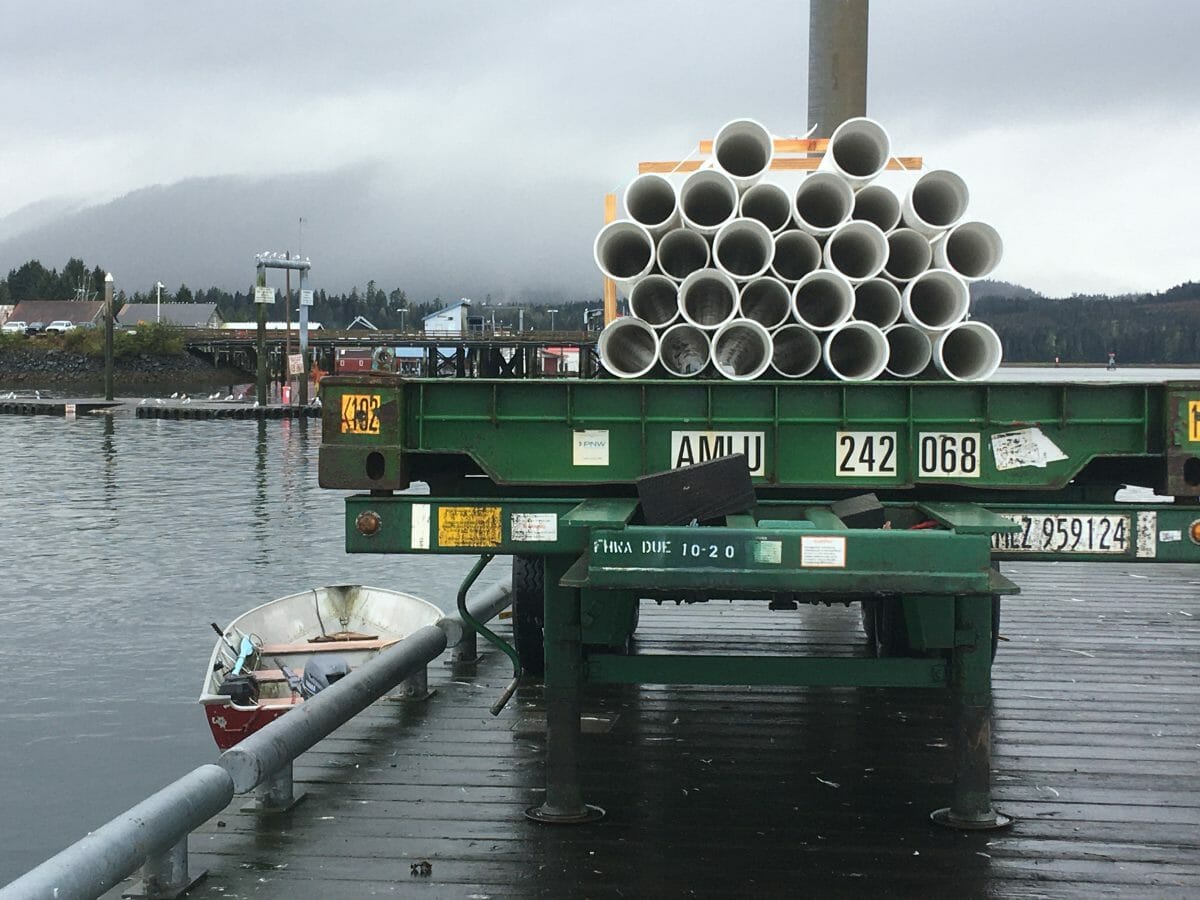
 Getting the pipe in is a breeze with the new Munson–two trips just to be safe on a 16′ tide gets me pretty close to the project site at the head of my salt-chuck. The cargo capacity is 2400 lbs and the pipe came at just about 2000 lbs. but I split it up simply because of the volume.
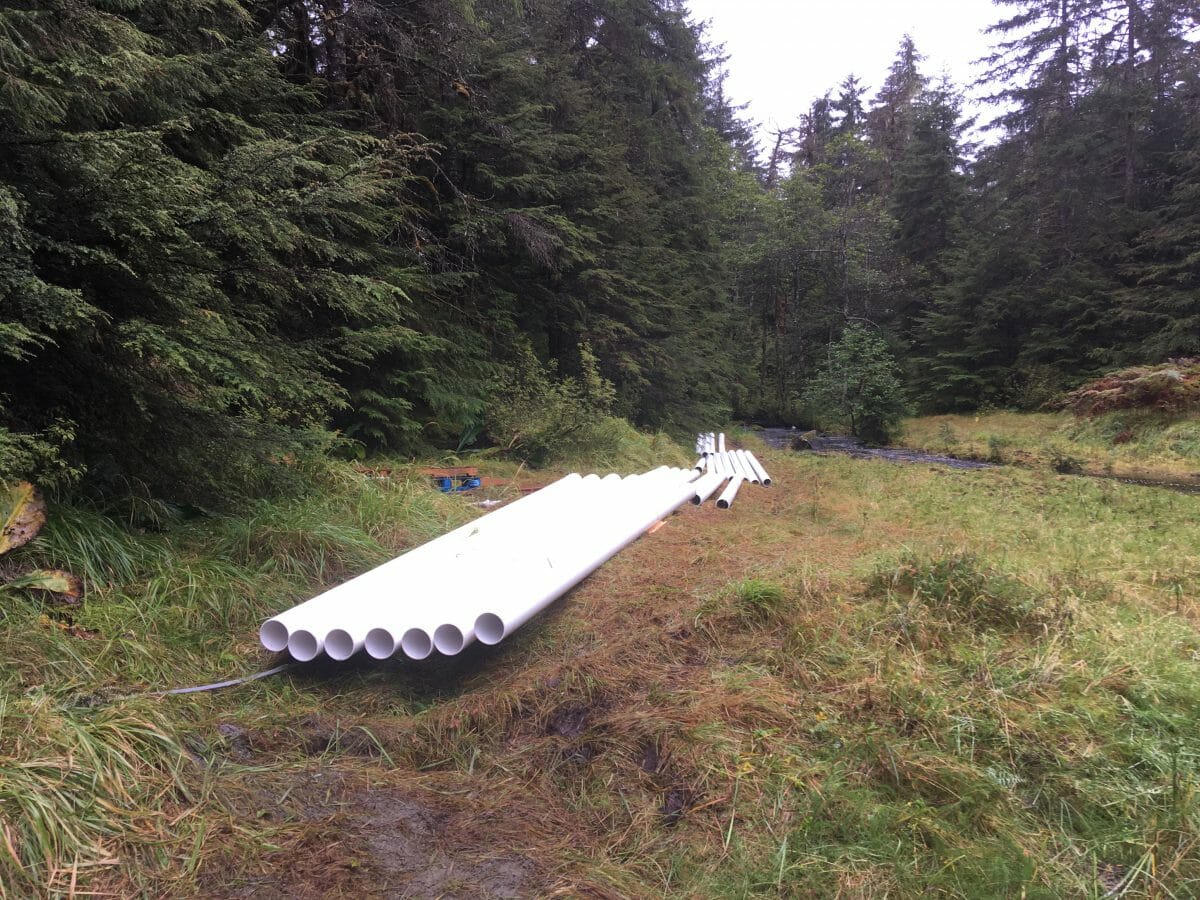 The pipe is staged–also all the tools, valves and 30 60# bags of premix concrete. Good honest exercise.
 These 6″ valves are a new design by Smith-Cooper called a “resilient wedge,” are completely open and out of the way as compared to a butterfly valve–friction in a low head application is very important. These are Chinese manufactured and price out at about $611 each for the 6″ model. They each weigh 106 lbs. The USA versions are over $2000 I’m told. Now you know why we buy so much stuff from China….. They are epoxy coated and can be buried underground if necessary. I ordered one of each (hand wheel and key) simply because I didn’t know which I’d need and thought I’d bury at least one in the creek bottom. Didn’t need to–read on.
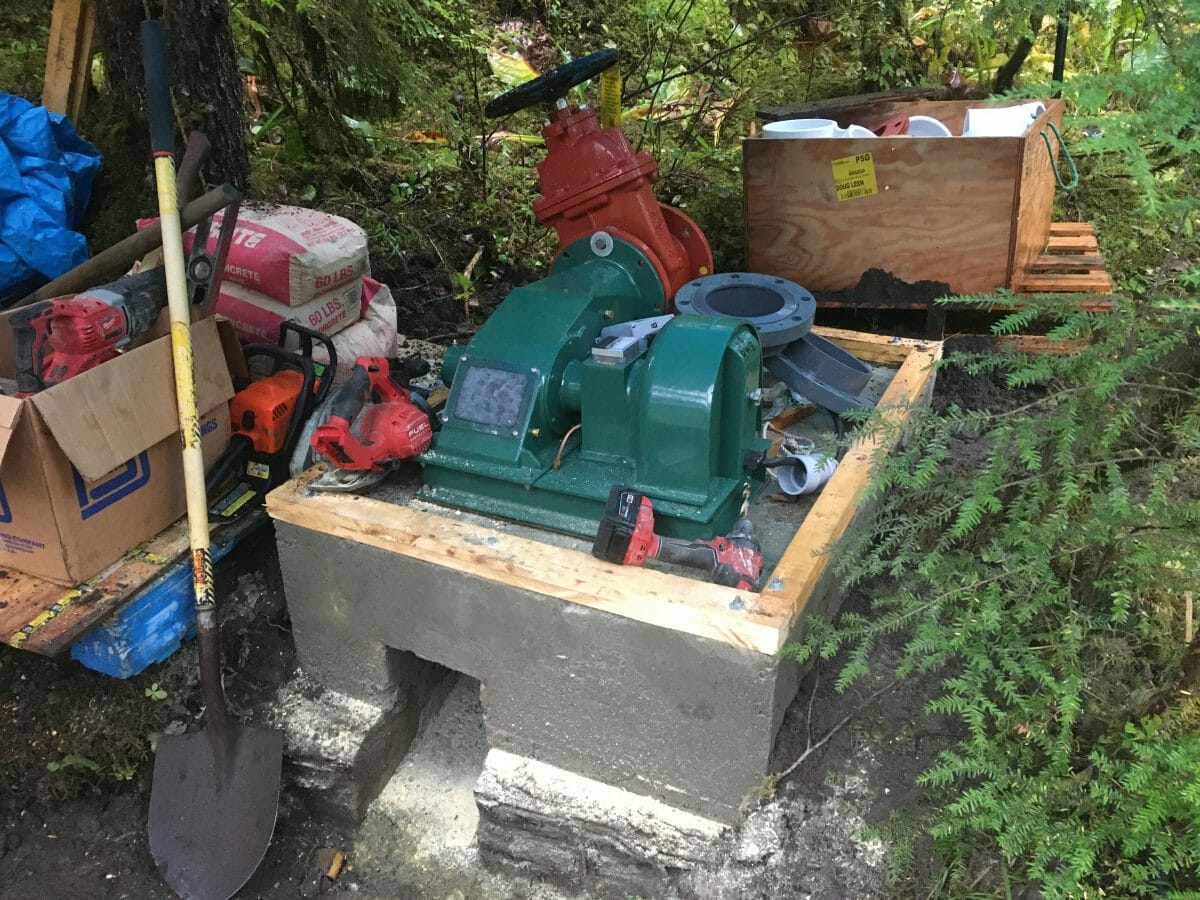
After the concrete sets, I pop off the forms revealing the full dimension of the spillway (12″ X 7″). The Scott turbine is mounted in place with rubber gasket and one valve with the hand-wheel is bolted on. I prepositioned all the bolts in the concrete including sill–all available materials–Alaska Yellow Cedar and marine plywood.
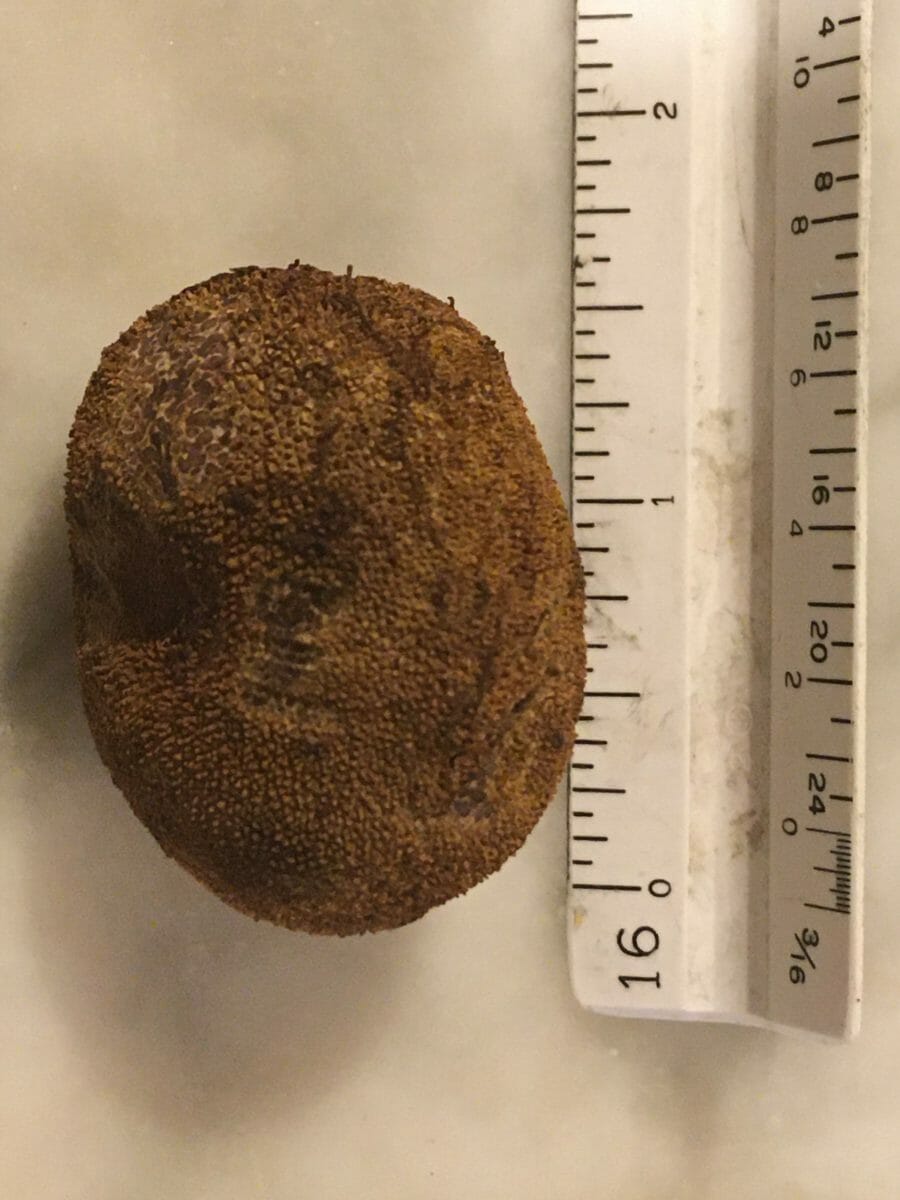
Intermission–I’ve been feeding a small group (flock?, murder?) of Steller’s Jays and one in particular follows me all over the property and I leave hidden almonds–his favorite–which he likes to find. On the way back to my net-shed to pick up a needed tool, he flaps behind me and I stopped about half way and left him not one, but three almonds in a little clearing I made on my boardwalk for being such a loyal companion. When I returned 10 minutes later, the three almonds were gone and this truffle was left in its place. I emailed Noah Strycker, who I had just heard on the Rick Steves Travel program on our NPR station. Noah wrote the book on Corvid intelligence (Corvids are the genus of birds that includes crows, ravens, jays, magpies, etc., not to be confused with the Covid virus). Noah put forth two theories: 1.) that the jay had found this truffle and was taking it to his cache when he stumbled across the three almonds and went for the almonds first–being unable to carry everything, or 2.) that it was simply a gift to encourage more almonds. He sent me another similar story of a crow leaving two spruce twigs which had been “ornamentalized” by adding beer-pop-tabs to. Here is a link to an article in Audubon that describes this behavior. And for further reading–visit my blog post about French truffles here.
 So, the powerhouse gets built and I have 6 bags of concrete left so pour a small porch.
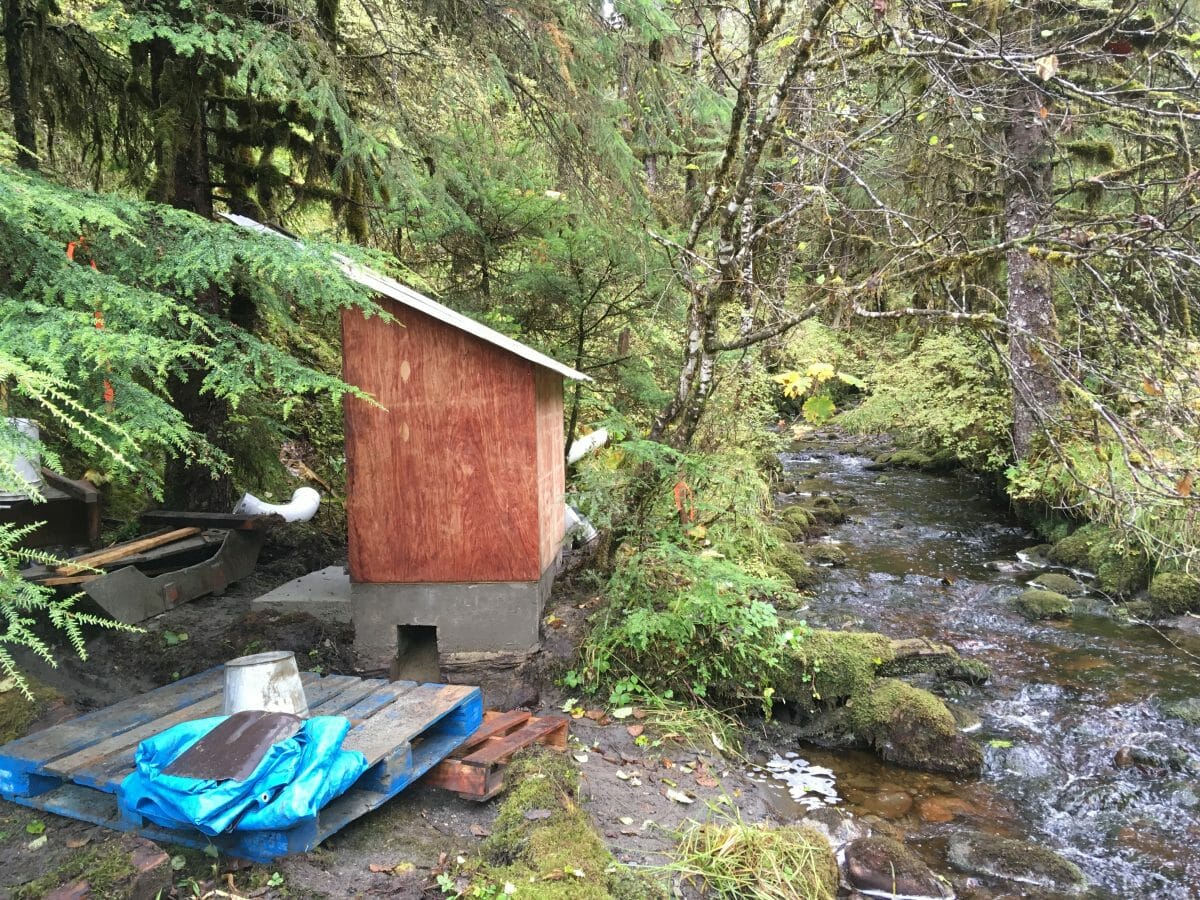
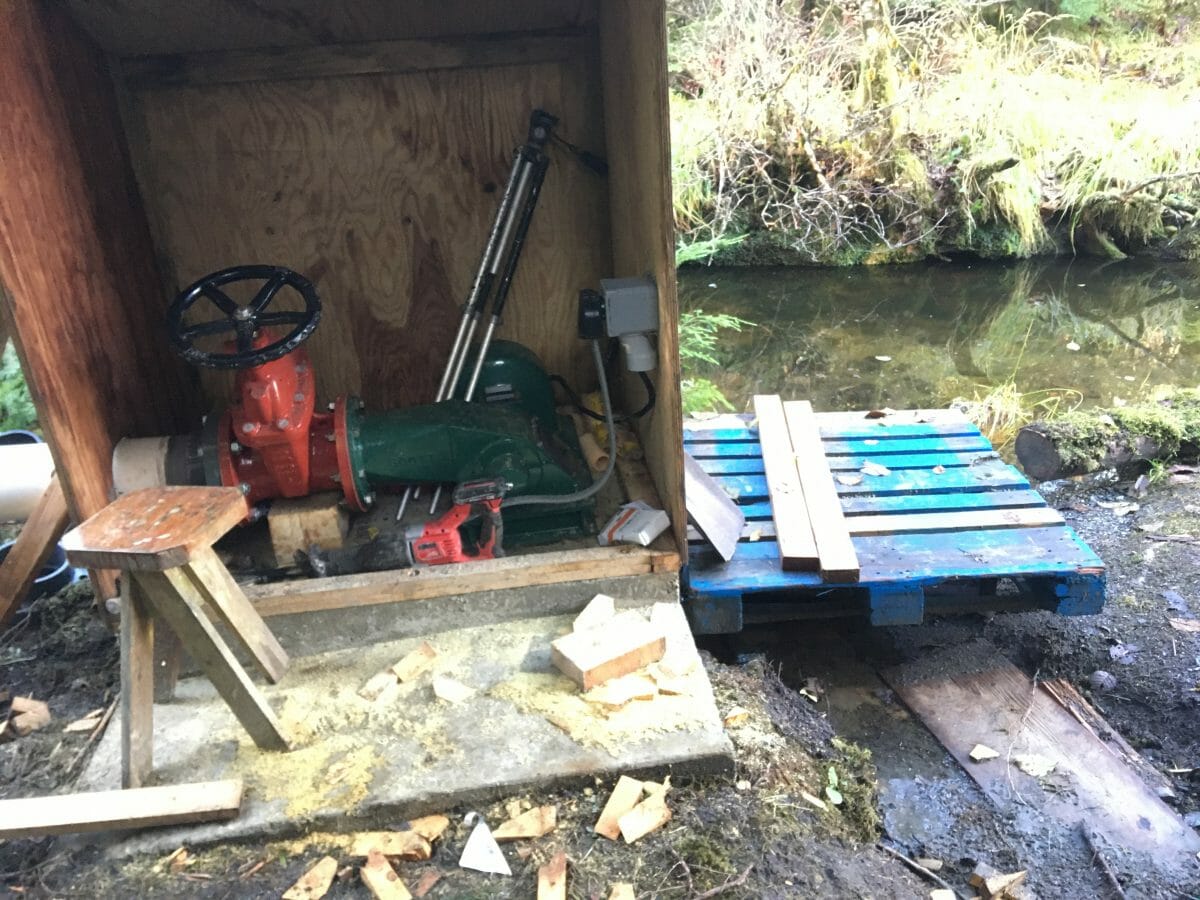 On October 18th we have the highest tide of the year–20′–and it approaches to the very bottom of the spillway–shown just below the pallet. Good planning! We’ll get higher tides during low pressure events up to 21′ or 22′ so I may have to remove the turbine during these rare events. Note the dryer plug so I can make a quick disconnect. Also 12 bolts. The 6″ penstock now runs through the gate-valve and uphill…..
 ….and uphill for 458′ to gain about 25′ of head pressure. Shown here are three sections or about 60′ with 2″ X 4″ AYC stakes supporting at 10′ intervals. Each pipe section weighs 70 lbs. empty; add another 230 lbs. for the weight of water or about 300# per section.
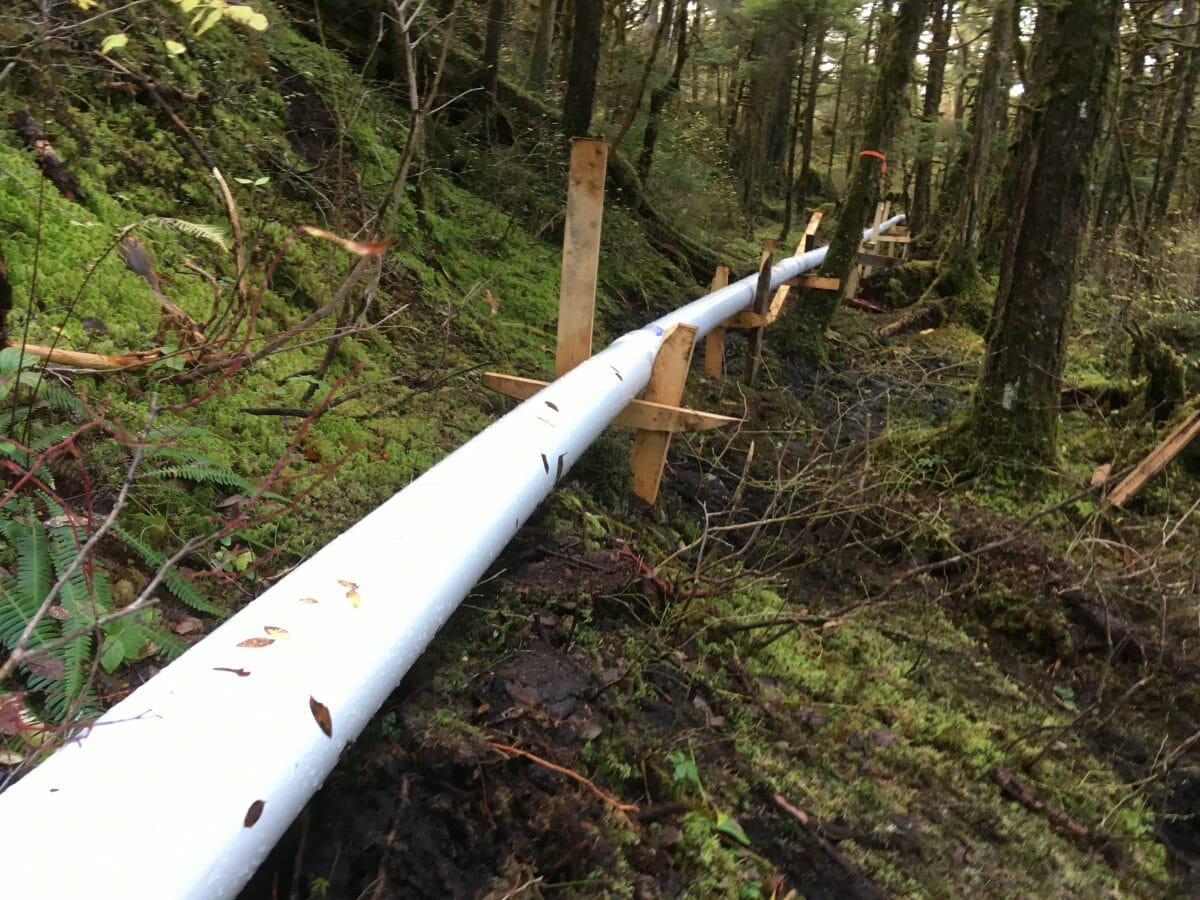 Turning around and looking uphill. These are temporary support placements–and will be augmented when my shipment of 2″ X 4″s arrives from Kake.
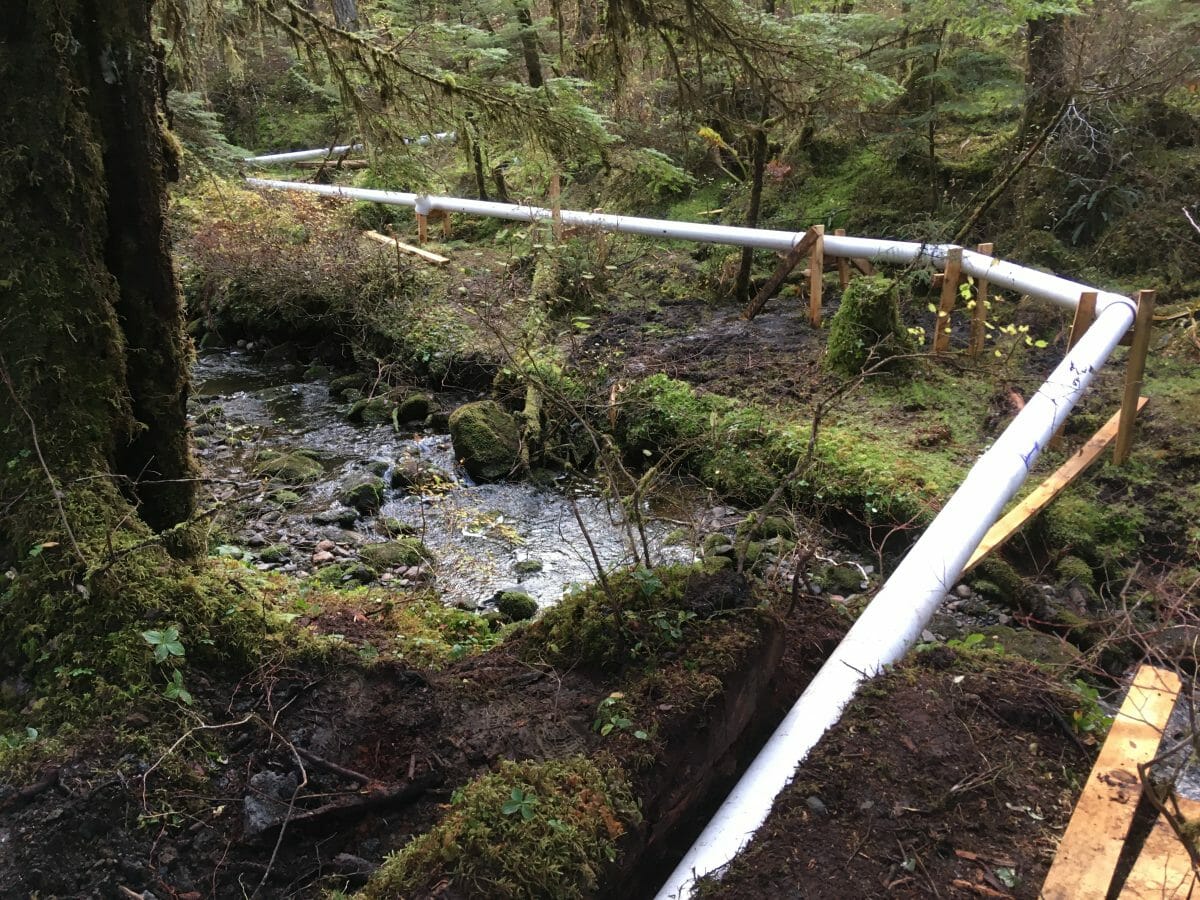 I cross the creek once after penetrating a small ridge burying the line about one foot. I’ll need to shore up this span–a joint is right over the center of the creek and is double wall thickness there (1/2″). I’ll get creative…..
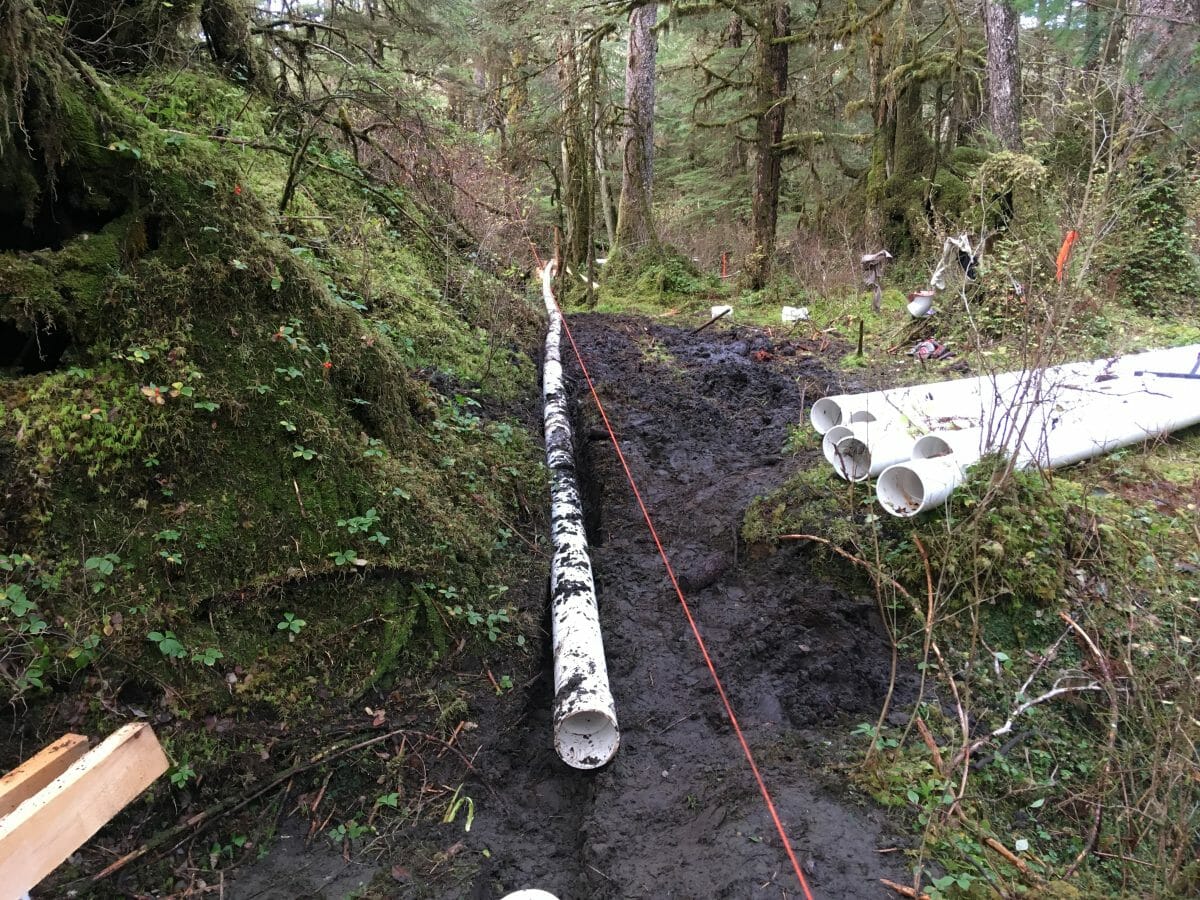
Crossing the muddiest section–real boot-sucking mud and just below grade. This is the final “meadow” but is about a foot deep of organic muck.
Here I’ve backfilled this same section–damn near drowned here and nearly lost my boots! I’m standing just uphill from where the east intake will continue and am looking back downhill towards the powerhouse.
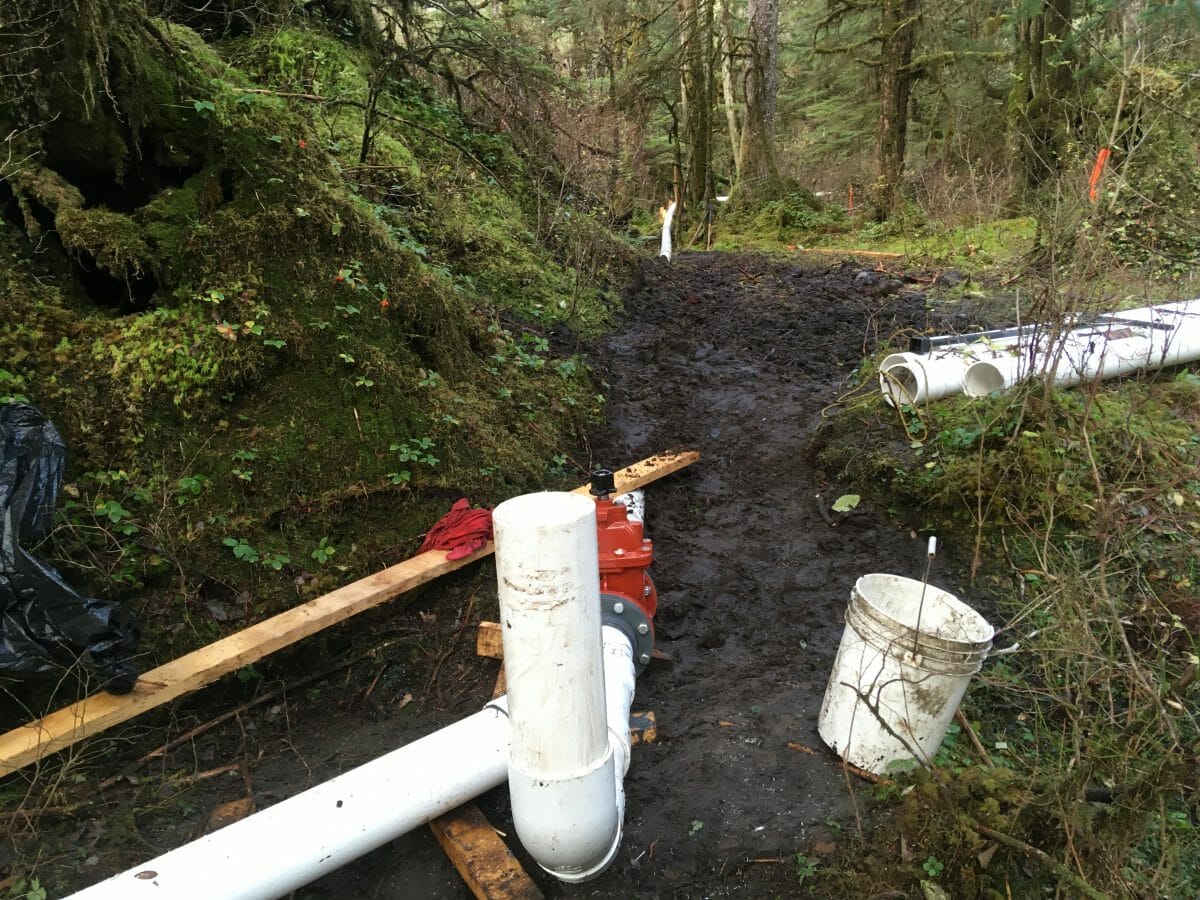
I now have four extra pipes plus 14′ of scrap out of 560′ ordered so that makes 466′ of run so far. The dry-fitted stand-pipe will be removed at a later date when the second intake screen arrives (it’s being fabricated in Denver and may have to wait until Spring). The standpipe is necessary simply to encourage water to run downhill. Let’s turn 135 degrees.
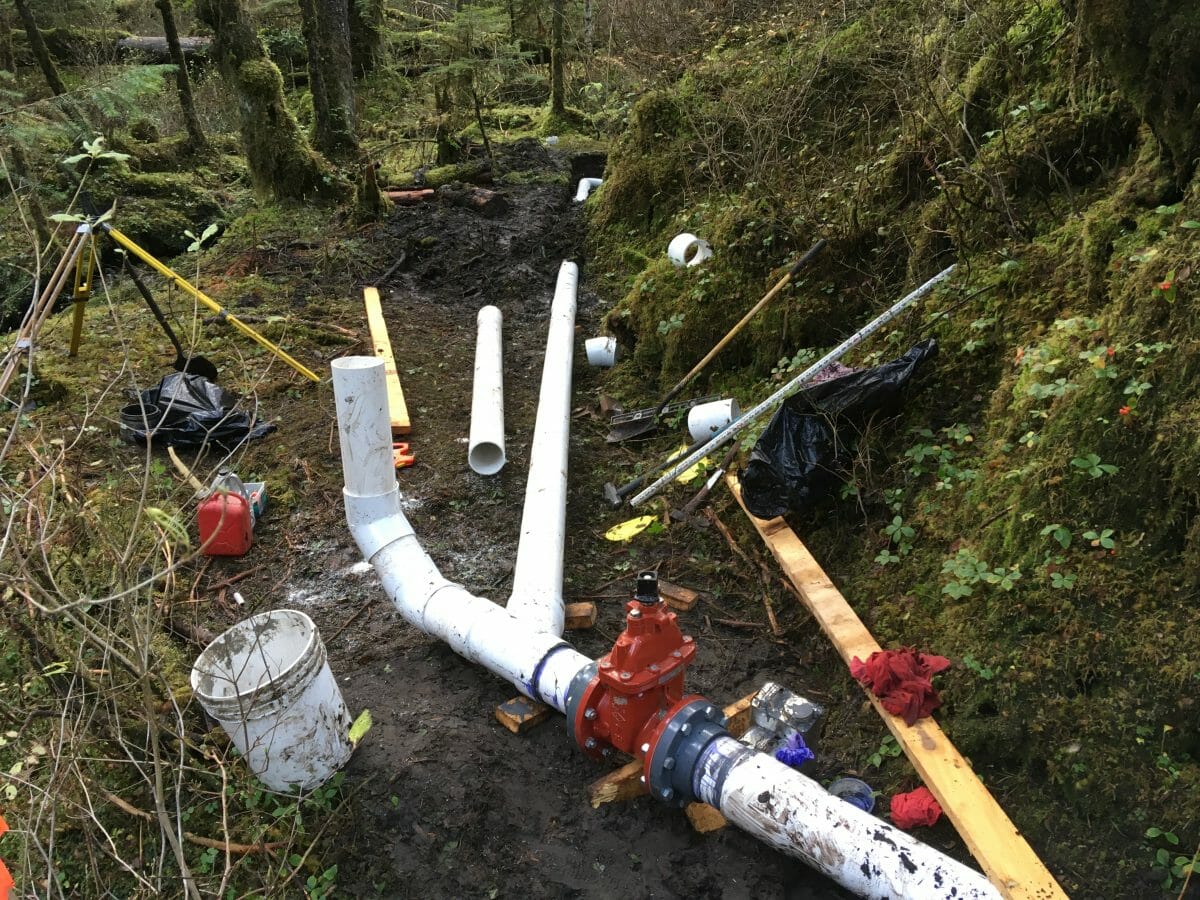
This is the “Y” looking up to the west intake. The second gate-valve has been installed (this one will converted to a hand-wheel). A drain plug will be installed on the bottom of this “Y” and also a permanent standpipe vent just behind the gate-valve to allow quicker drainage and prevent hammering. Total water weight in the system will be 6324 lbs when both intakes are full. The penstock runs under soil ahead–the last impediment before entering the creek for the final time. It’s time to explain the intake screen.
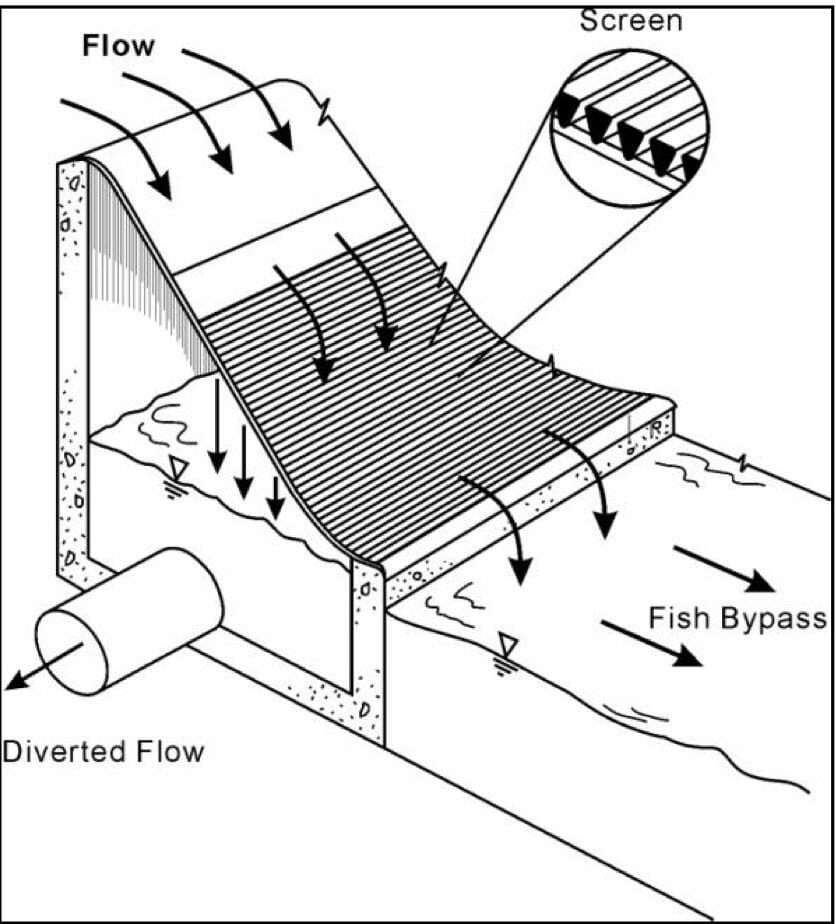
This is called a Coanda screen–it’s a Canadian invention (oh, those clever Canadians) which is also called “wedge-wire.” The water passed perpendicular to the screen wires which are trapazoidal in cross-section. They are spaced about 2mm apart.
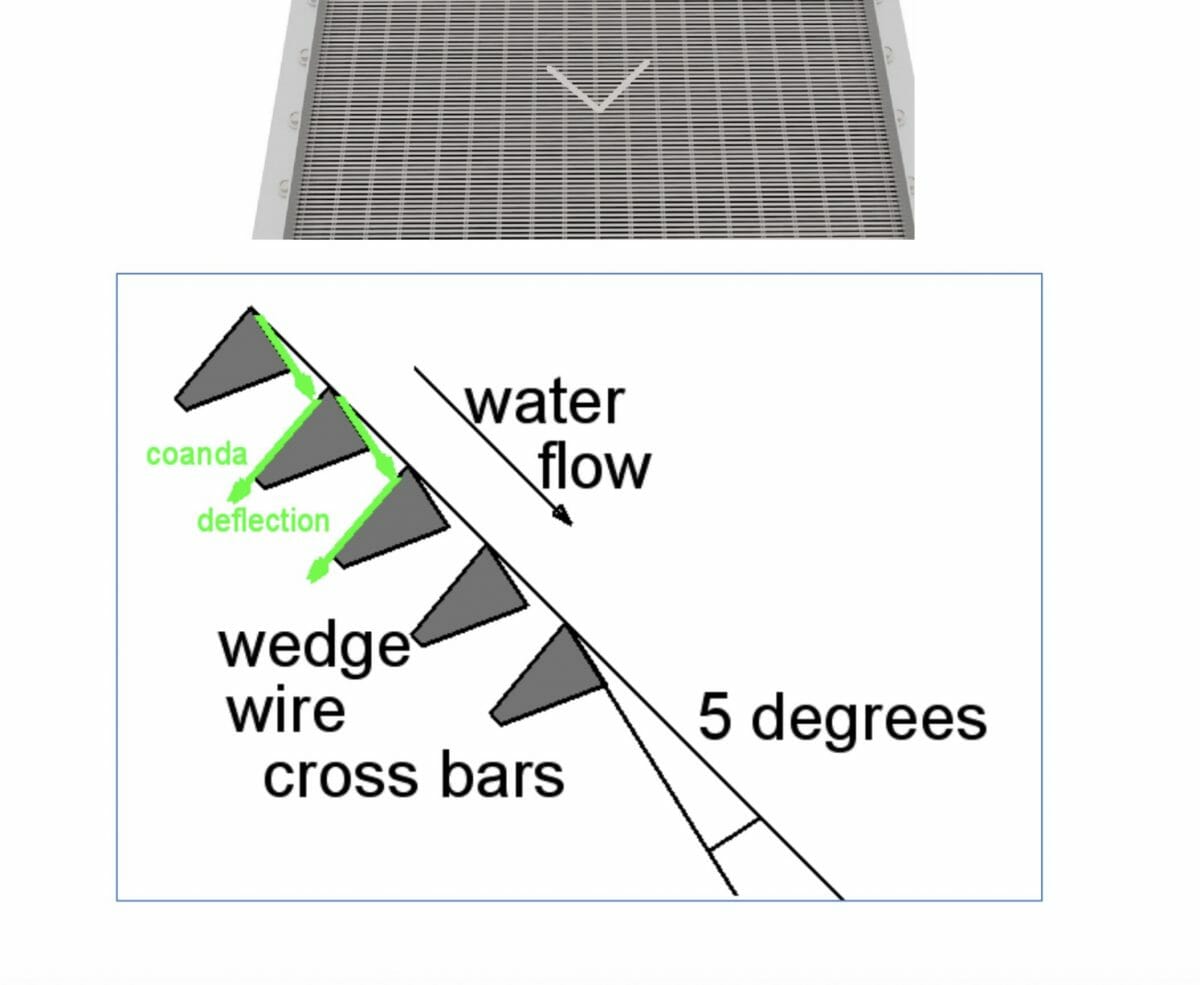
Here’s a cross-section of the mesh. The key is the 5 degree tilt of each ‘wedge’ section which when viewed from above the run, looks and functions like a cheese grater. The taper of each wedge creates a venturi effect which pulls the water through. Very clever–leaves can wash down and fish can swim up it’s 45 degree slant.
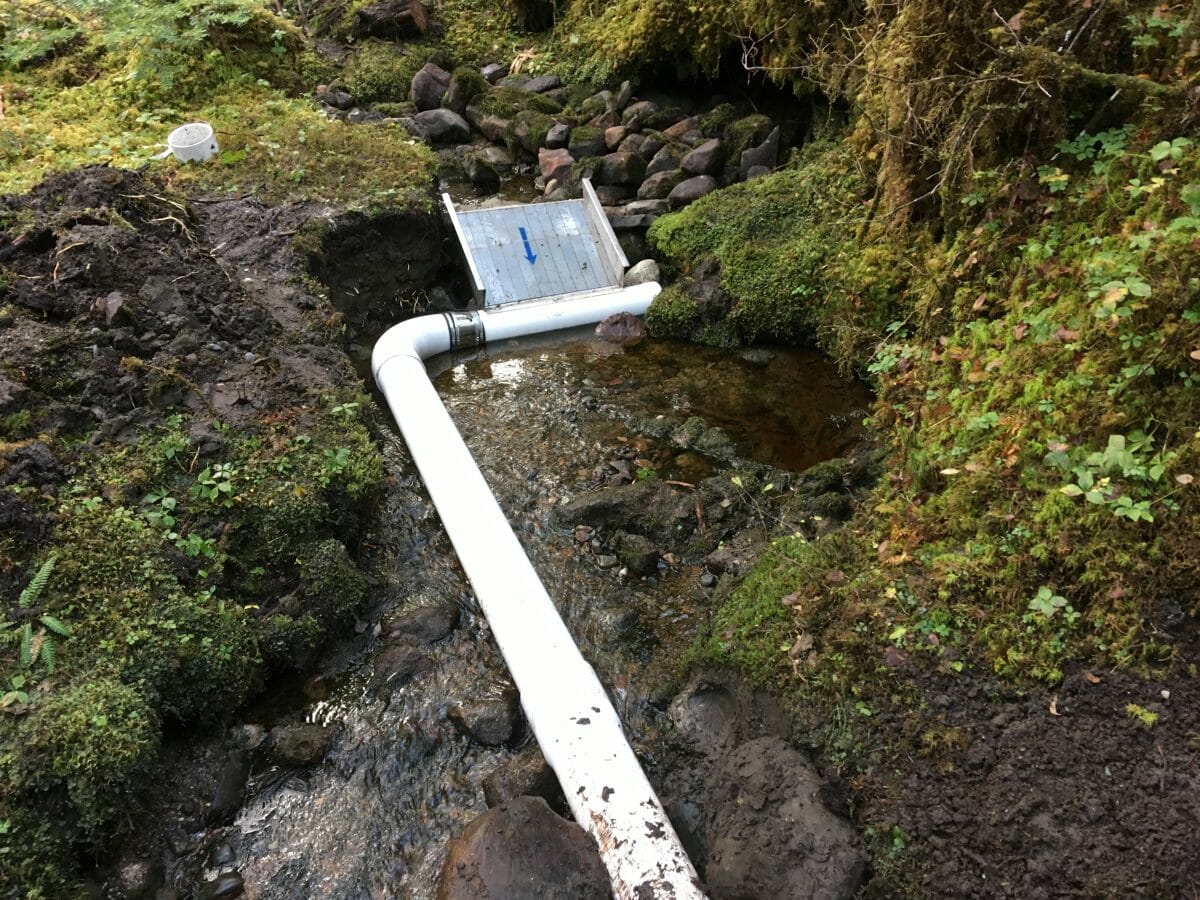
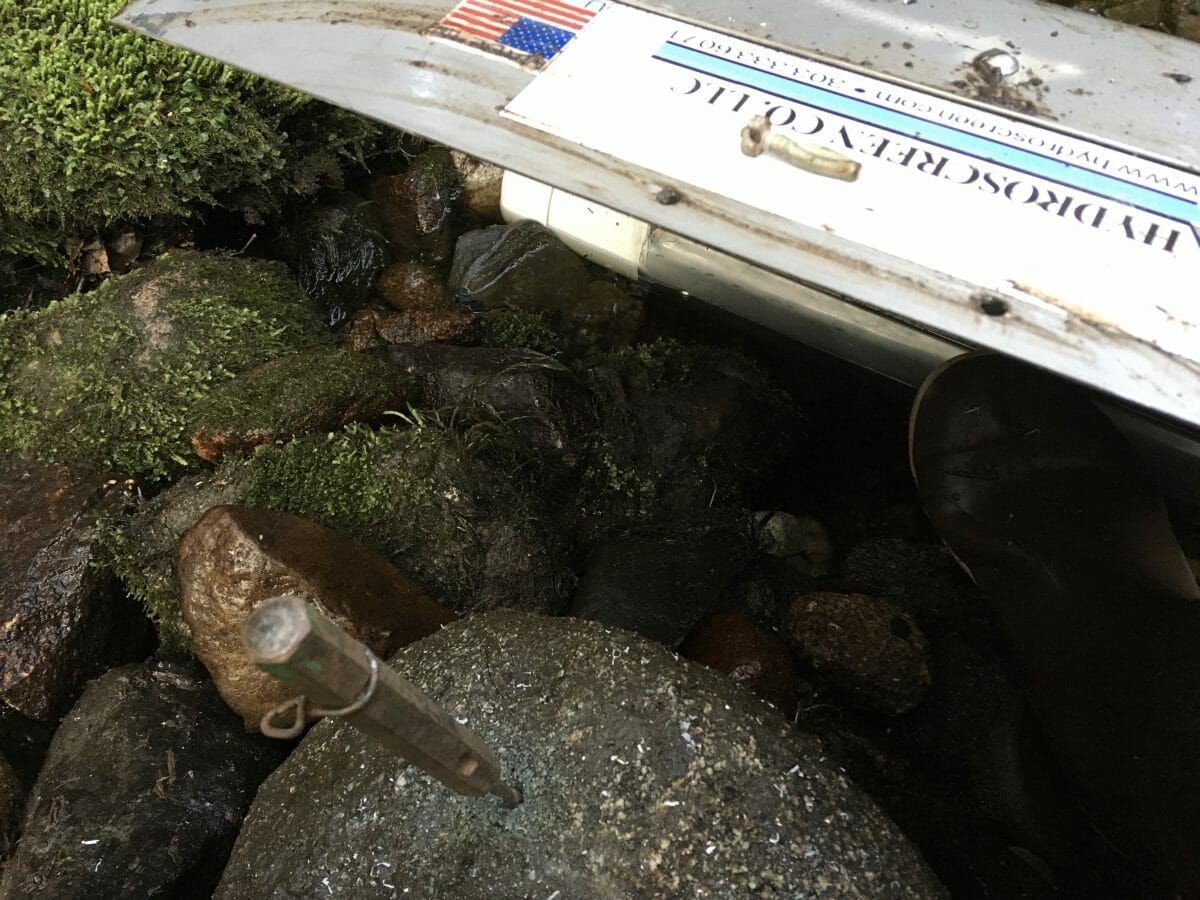
Here’s the intake in place–this screen is manufactured by Hydroscreen CO, LLC. I’ve rolled a huge 200# boulder directly behind the screen and using mountaineering bolt kit–installed two expansion bolts and fastened the top edge directly to the boulder–this isn’t going anywhere (I hope). I’ll landscape more boulders creating a small swimway to the right of the screen to give fish the choice. There are four species of fingerlings that hide up in these small Alaskan creeks after getting run out of the larger rivers by their peers–that is why Alaska Department of Fish & Game insists on a specific design that protects fish. Here is the fisheries report which I found quite interesting. 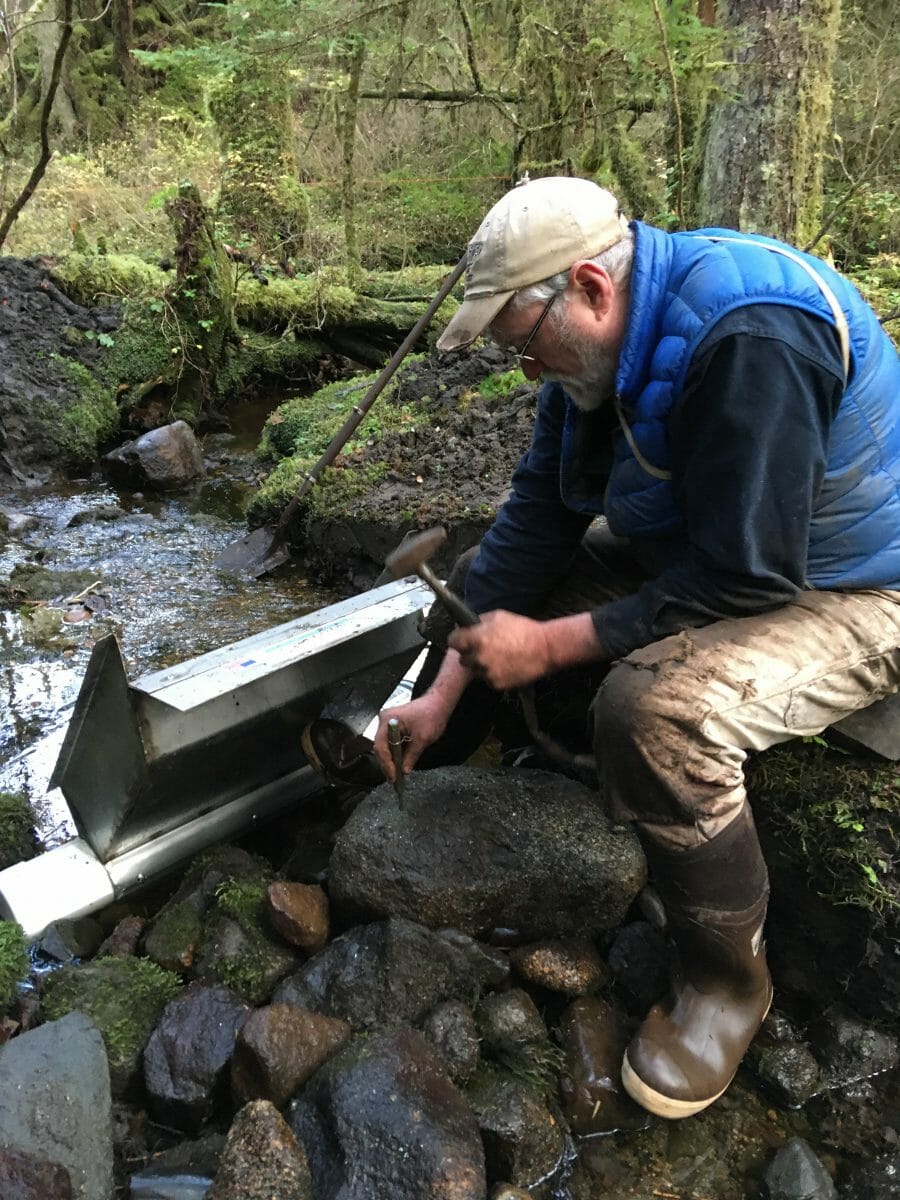
This is the bolting procedure–the boulder is bigger than it appears here. By hand tapping the drill with my old rock hammer, 1/2″ deep holes take about 10 minutes each. Here’s a close-up:
The last time I used this drill was on the summit of Teewinot Mt. in Grand Teton National Park drilling a hole to install the USGS marker denoting the summit elevation:

Boy, I was a young whippersnapper then!
OK–now some economics. This clearly isn’t a cost savings project, at least for a long time. Especially in Alaska where shipping is very expensive. Time: The eleven years could have been shortened drastically and FERC admitted that didn’t advise me properly about the exemption so perhaps this could all have been done within a couple years. If I can get Murkowski’s office on board with a single-conduit application, this theoretically could be done in half that time or less. Labor: I can honestly say I spent much more time filling out forms than the actual construction. After a couple of false starts and about $600 worth of casual labor, it took me about 10 days to build this system–spread out over a month. All the labor was hand-labor and mostly mine. I mixed all the cement by hand and installed everything myself. Battery power equipment was a lifesaver and so was my hired help hauling the heaviest stuff. Costs: This is the stopper for most folks. The total out of pocket costs were $18,500. I estimated $15,000 but again, it’s much cheaper than Hoover Dam. Shipping was almost $3000 of the cost on AML. The decision to get a FERC waiver was central simply because with a FERC waiver, my permit runs in perpetuity providing I provide proof of maintenance and no abandonment. So effectively, I’ve gained another 0.65 acres which no one else can encroach upon for water usage. An actual FERC license must be renewed every 20 years and there are no guarantees that the rules or costs won’t change.
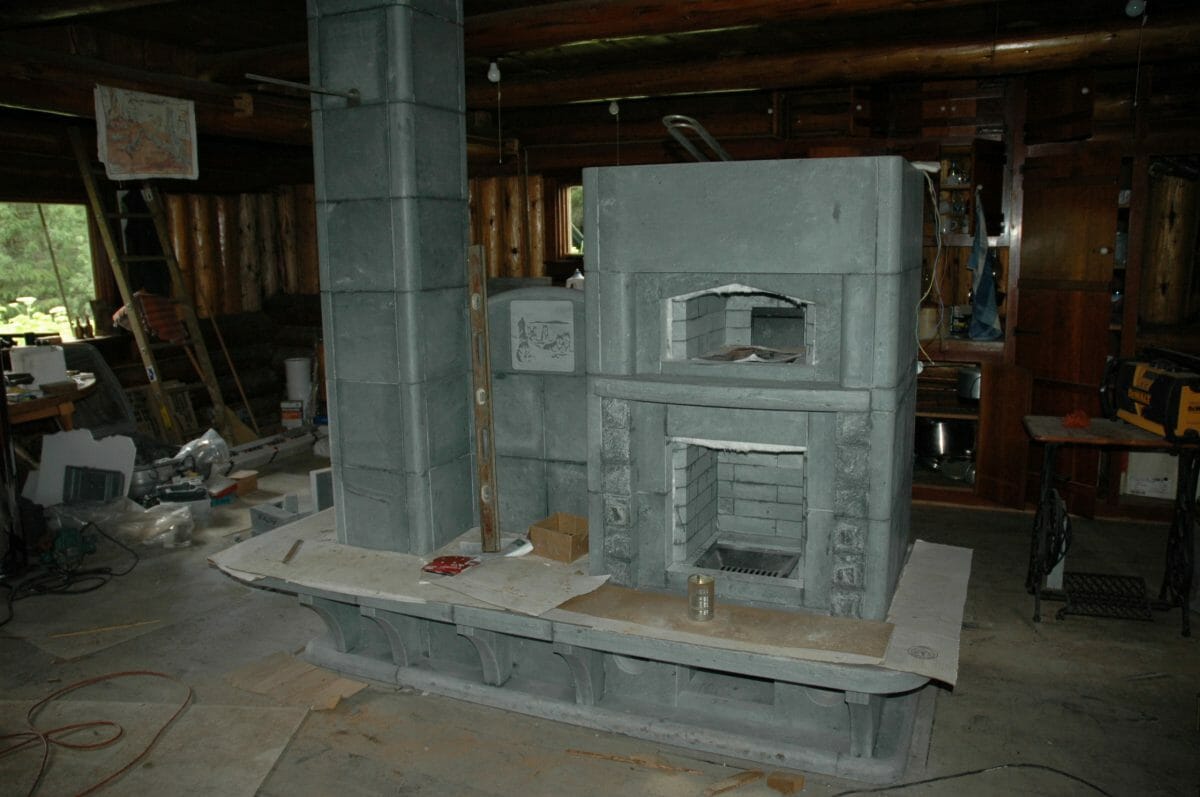
Another footnote–the technology is rapidly changing. Before actually generating power, I’m running into hurdles on how to couple disparate systems together–can my one-year old technologically designed batteries see the charge controllers and cooperate with the load transfers while floating charge? These questions are still not answered. As I work out these solutions, I’ll include wiring diagrams for the various charge controllers and load diversions. Got to keep the electron flows happy–unlike solar, hydro (and wind) generation of power has to dump the excess load. That will be in my Tulikivi in the cabin-a 12,000 lb. soapstone monolith which will act as a heat-sink or…..heater:
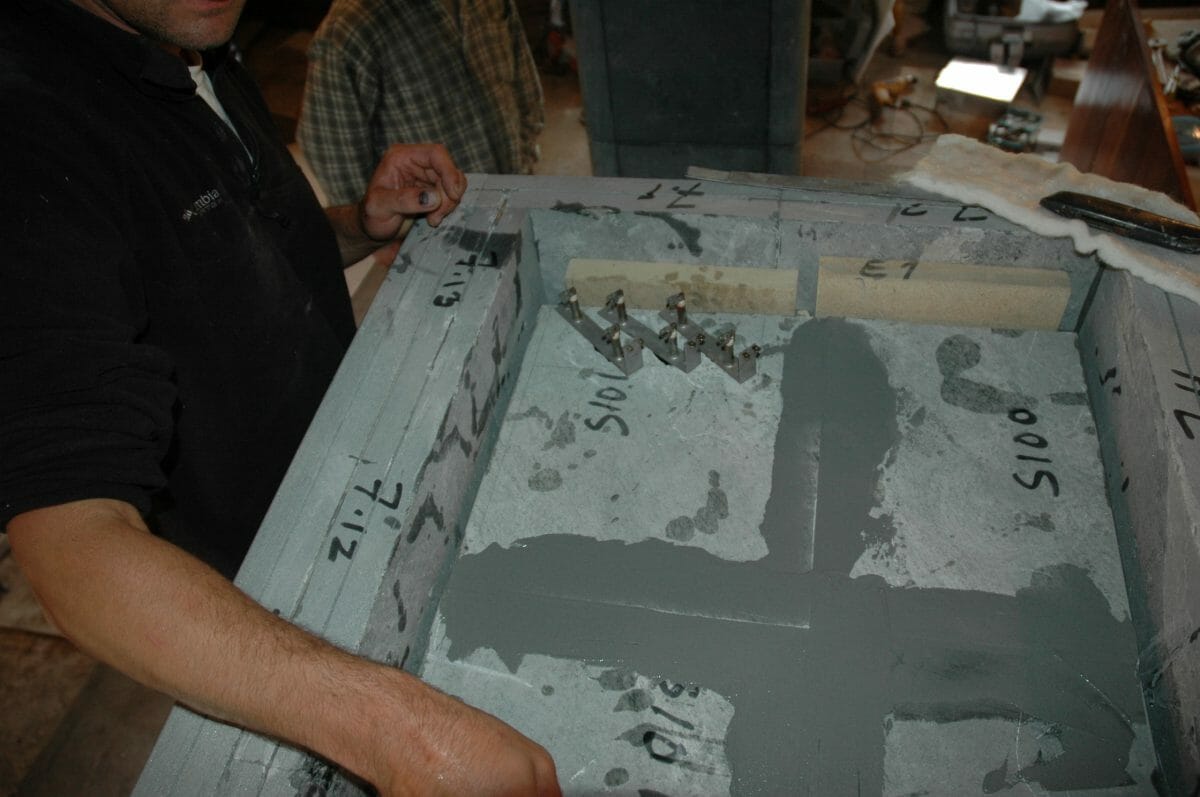
Here are the heating elements (below–look for the three sets of terminals) which will absorb about 800 watts of excess power from the hydro turbine.
A short discourse on off-grid energy: My energy costs here are approximately $1000-$1500 a year just for diesel, so in 18 years, this will break even. When you look at the whole energy system there is a generator, solar panels and perhaps wind. Then you have to store the energy in batteries. I finally cashiered my Hang-Chow Nickel-Iron (Edison NiFe) batteries purchased from “Be Utility Free” seven years ago for $16,500; who is now out of business. Here’s my letter to the BBB of Colorado. Is it worth it? Who knows–but it’s been a learning experience. I’m sure there’s a bit more learning ahead also. My solar actually has paid for itself and during sunny summers and clear winter days, I’ll generate power for weeks at a time without any augmentation from the generator. Wind is next!
There is still some clean-up to go, another intake screen to install, and some toying around with the creek flow to direct water into the intake. But I love to splash around in the mud….. Stay tuned–I’ll make many edits to this as I improve the system!