
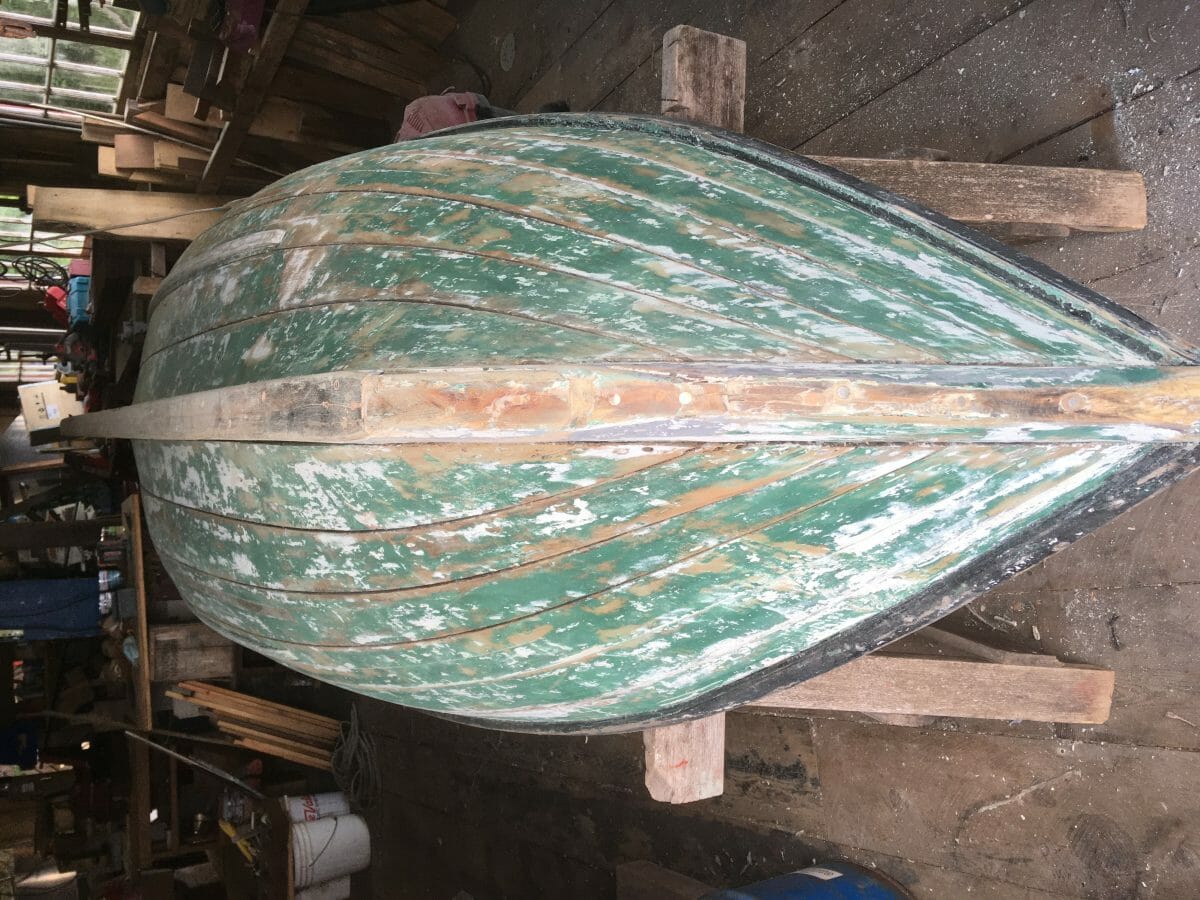
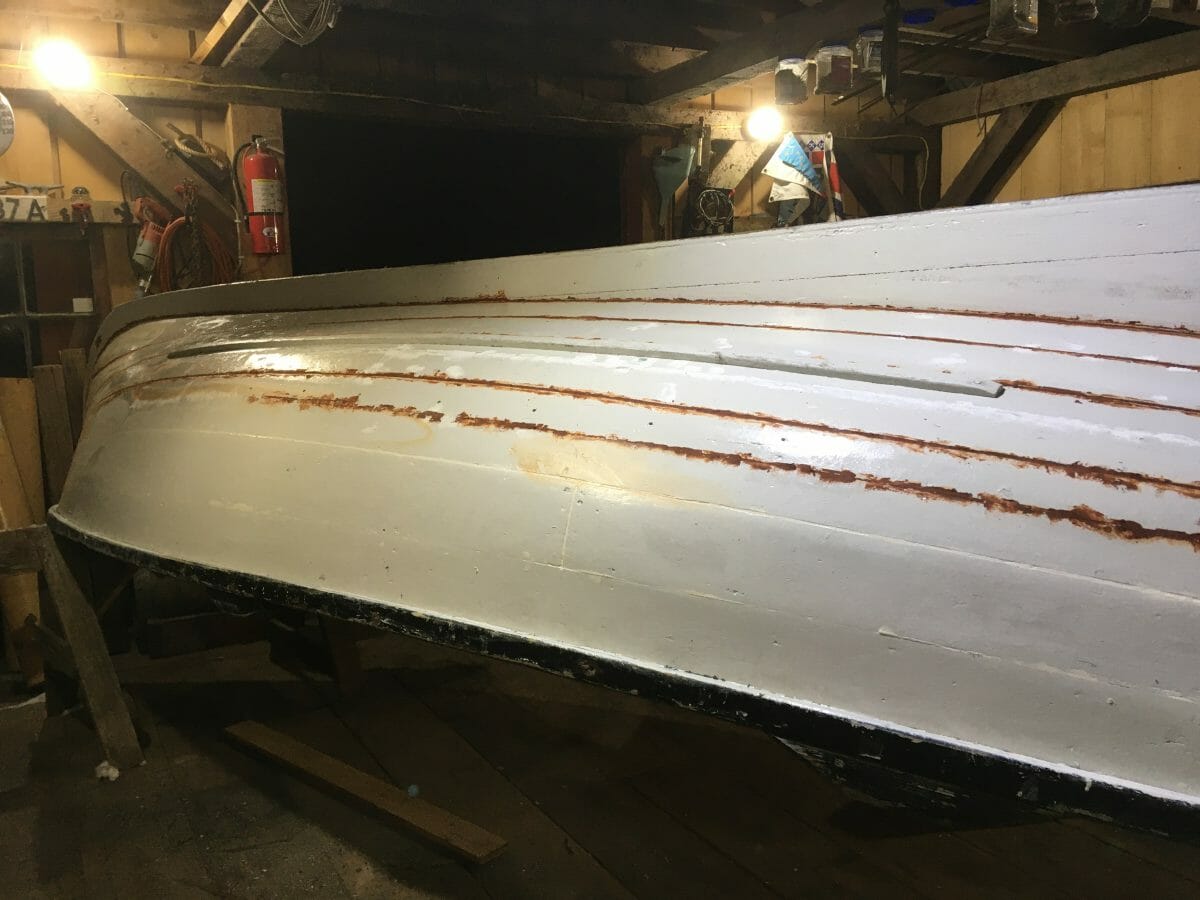
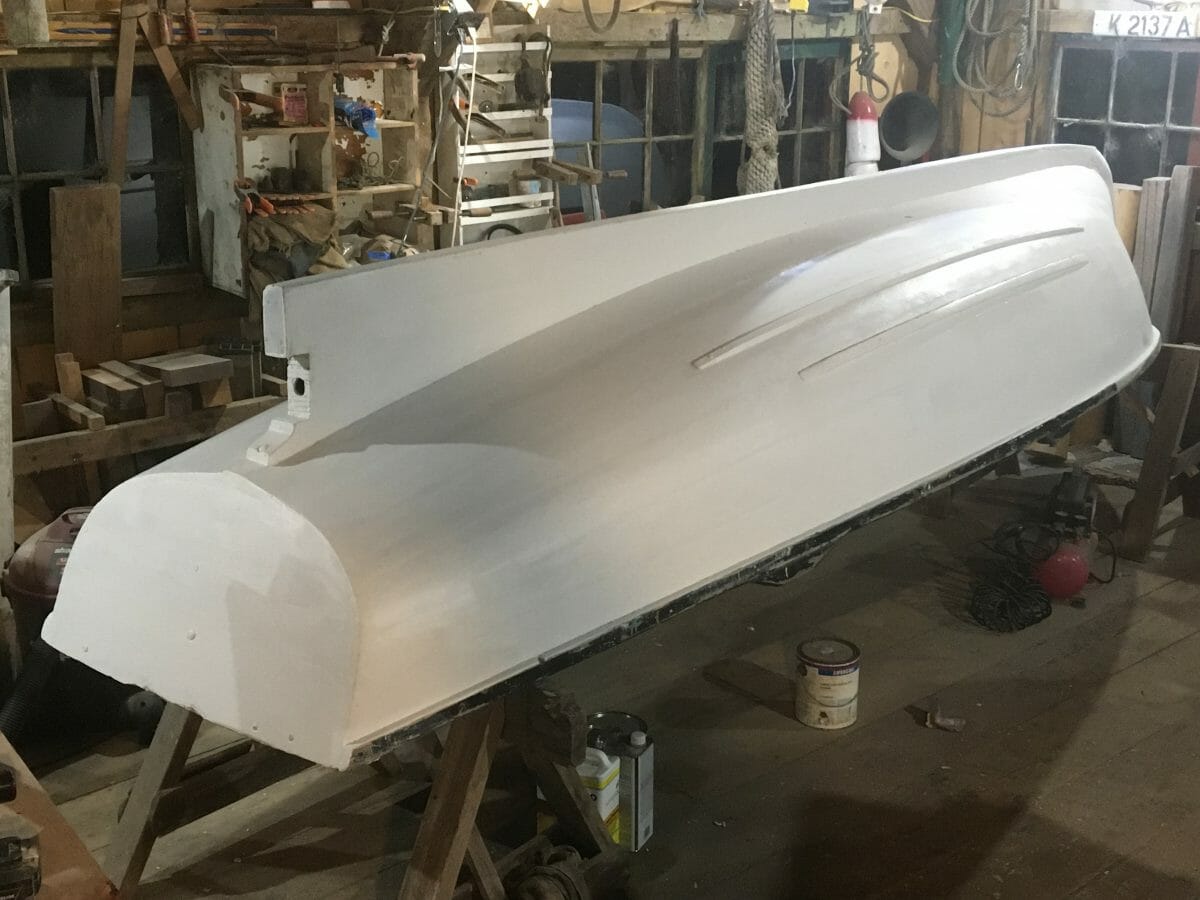
What’s better than spending the last hour of the day sanding a boat like this…… This 15’ foot motor boat has been sequestered away under a Petersburg waterfront warehouse for three or four decades—with only the highest tides able to slap its hull. I finally talked our retired harbormaster, Jim Stromdahl, out of this project and it has sat for a couple years in my warehouse while I replaced some major beams and all the facade to mine. So now it’s time to get to work after clearing out enough floorspace. Leif was Jim’s father who was a Norwegian who bought this boat for his kids way back when–so I’m naming this restoration “Leif.” It was originally owned by Magnus Martin and was thought to be a “Davis” boat built in Metlakatla. Perhaps not, but it makes a good story and it’s a beautiful hull–let’s get to work! (stay tuned more posts on the restoration…..) Here’s how I discovered her:
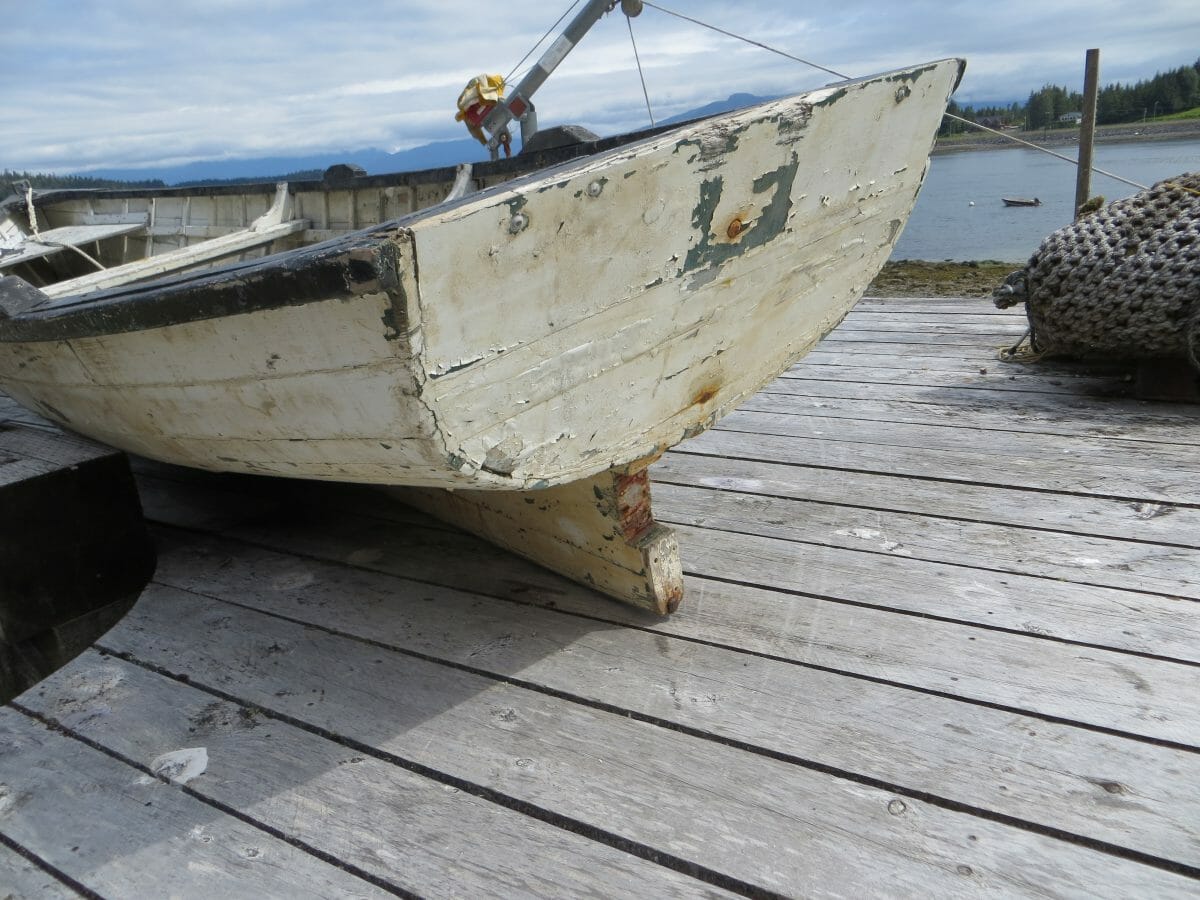
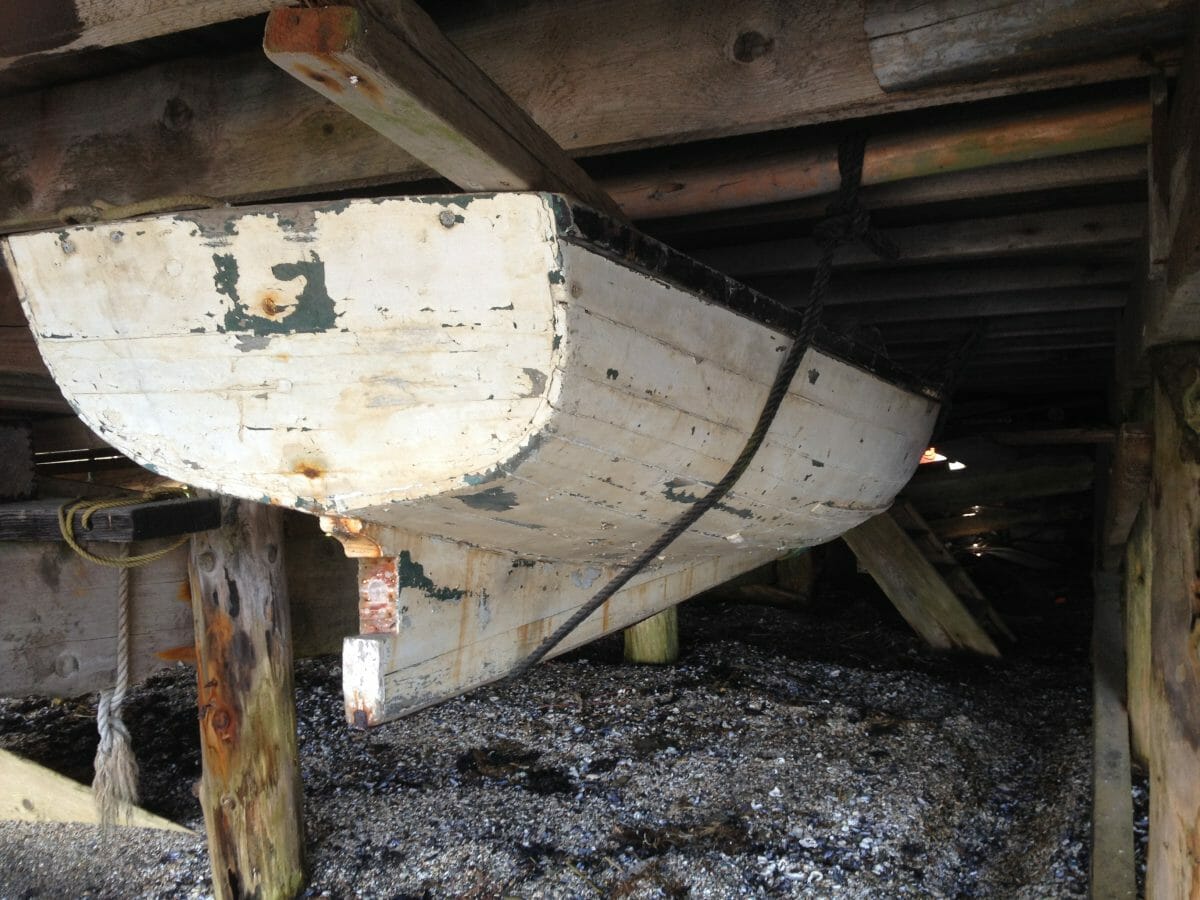 After hauling her across the Narrows and lifting her onto my dock.
 More should be known about Davis boats (if indeed, she is a Davis) as that family built much of the original fishing fleet in Metlakatla Alaska at the turn of the last century. Here is a link telling the Davis history.and another link with even more history!
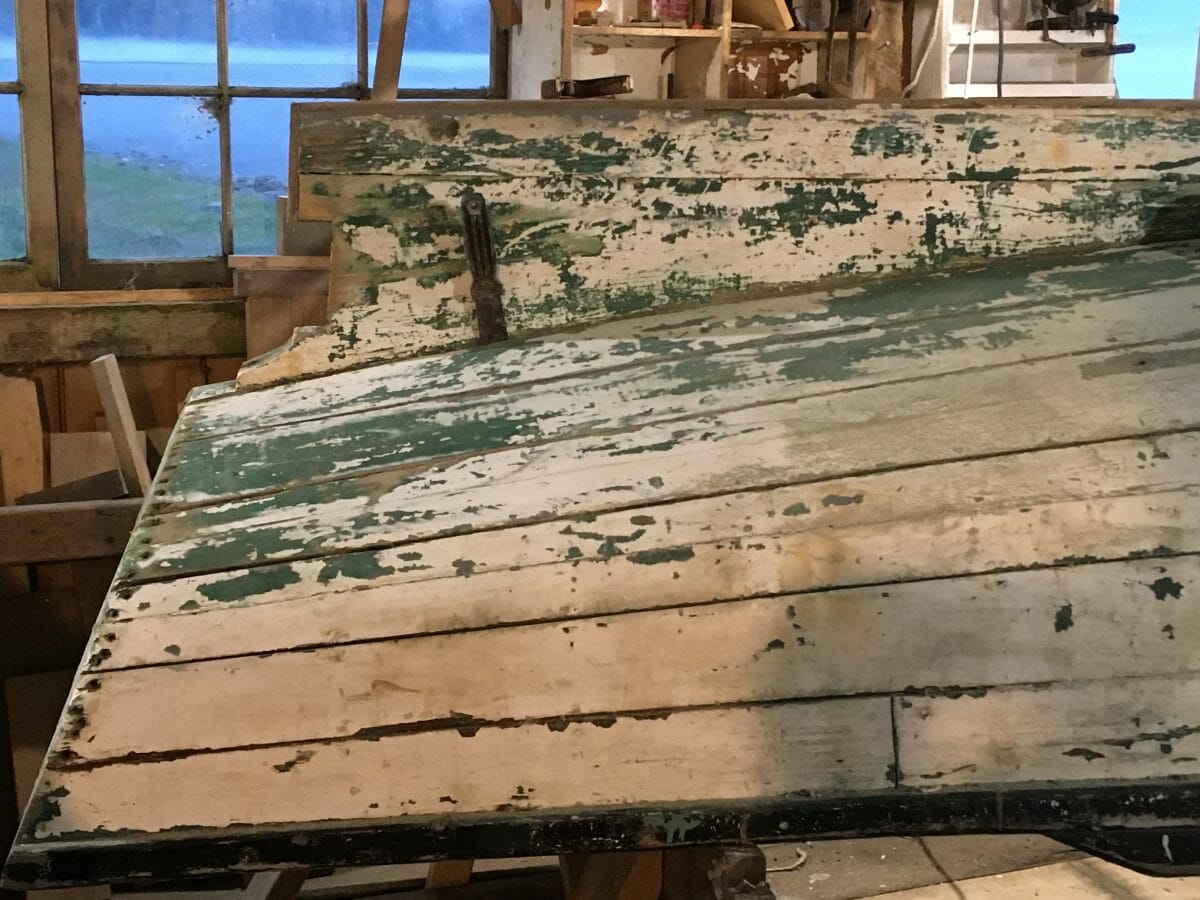
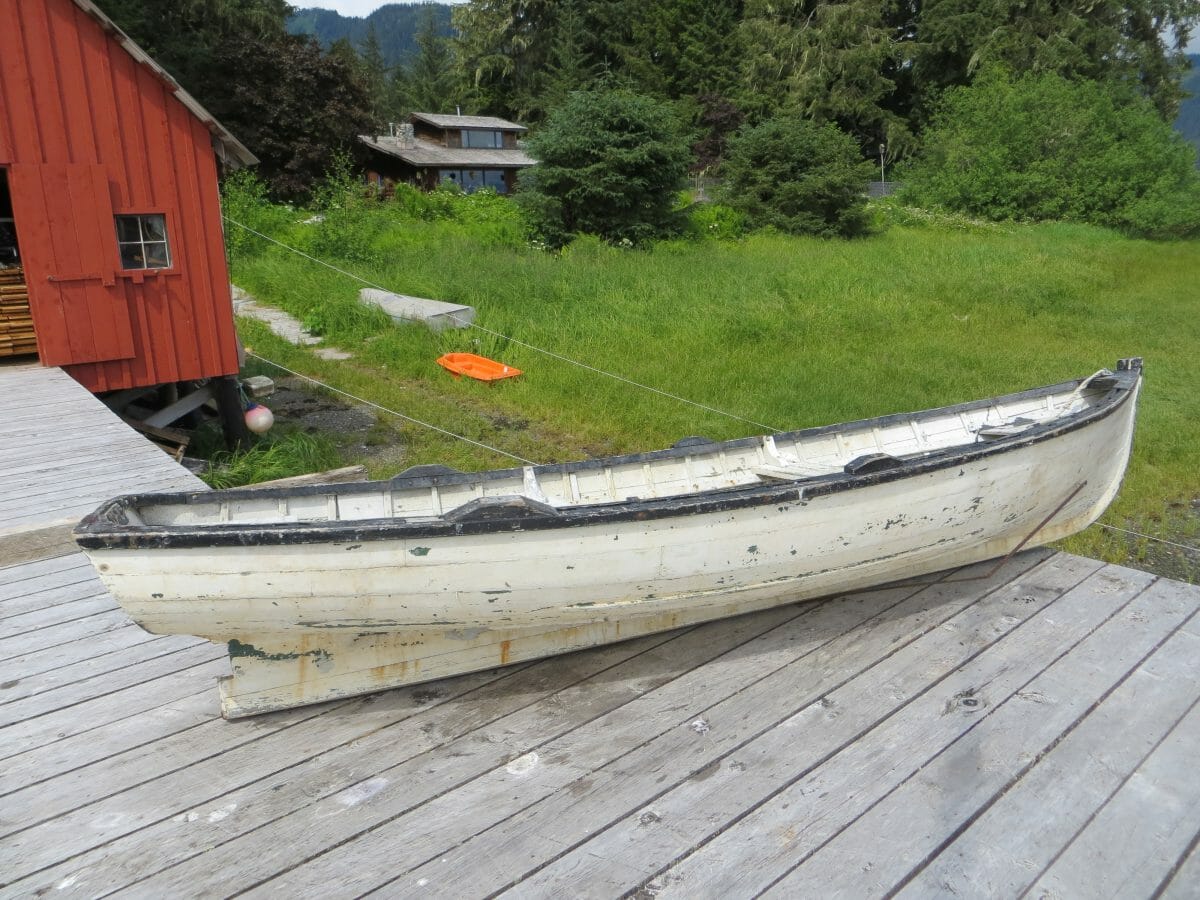 It’s time to drag her inside the boat shed and roll up my sleeves…..
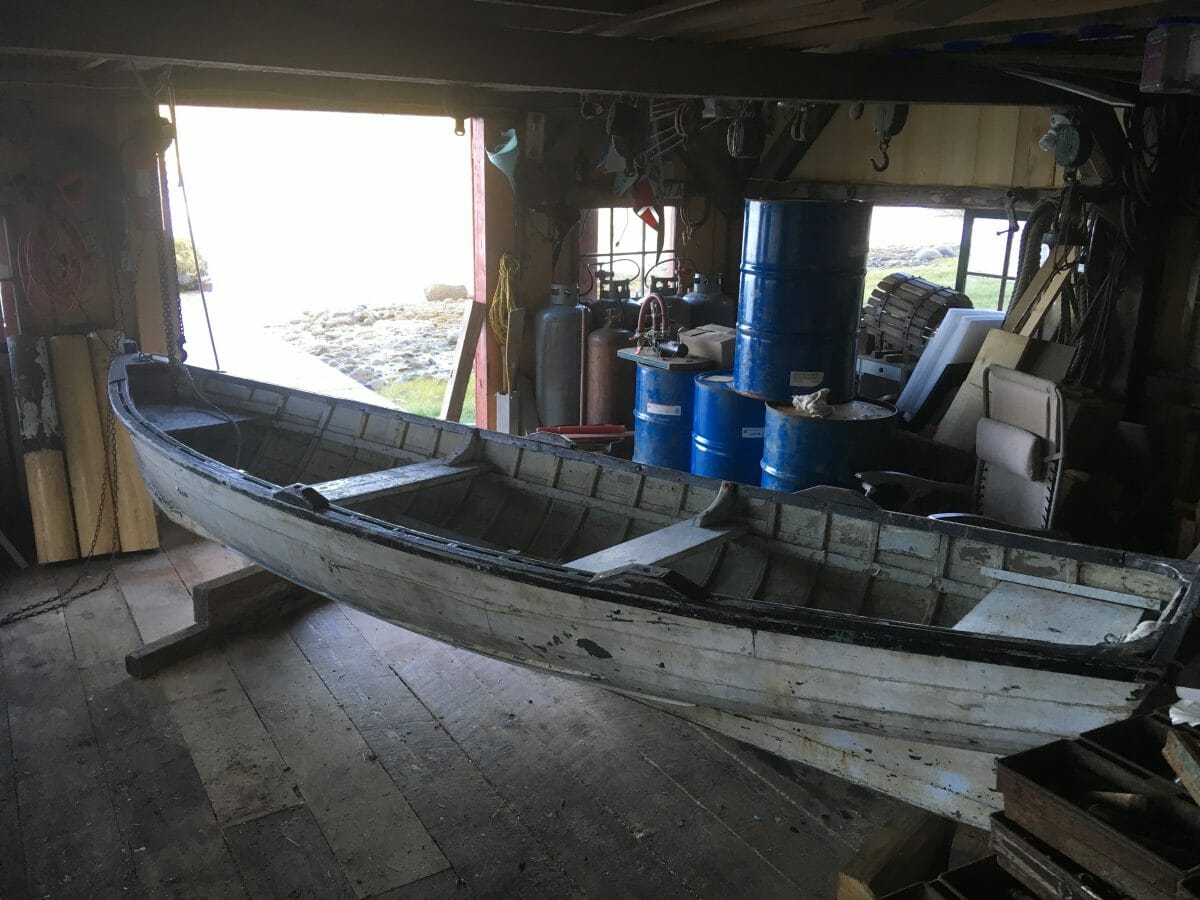
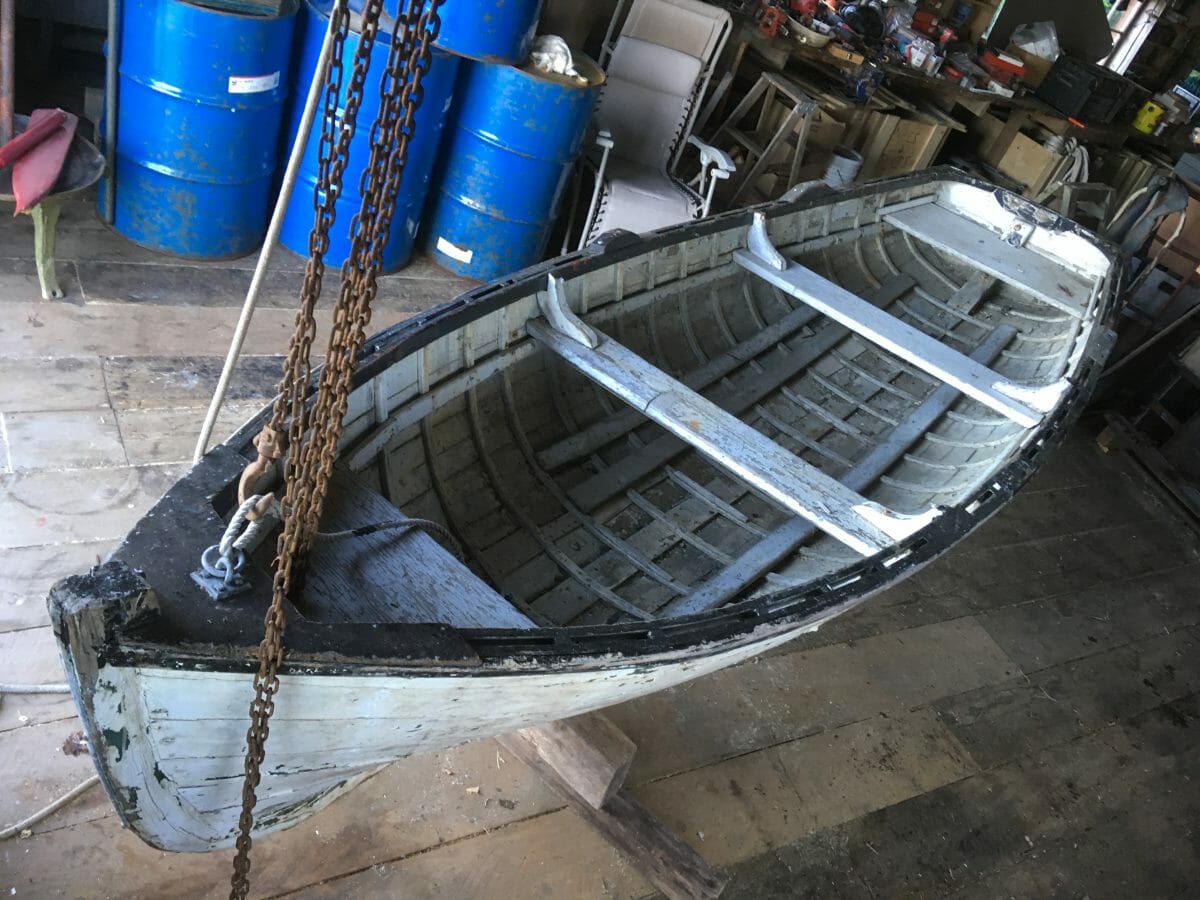
First thing I do is put a chain-fall on eaach end and raise it up and block the boat.
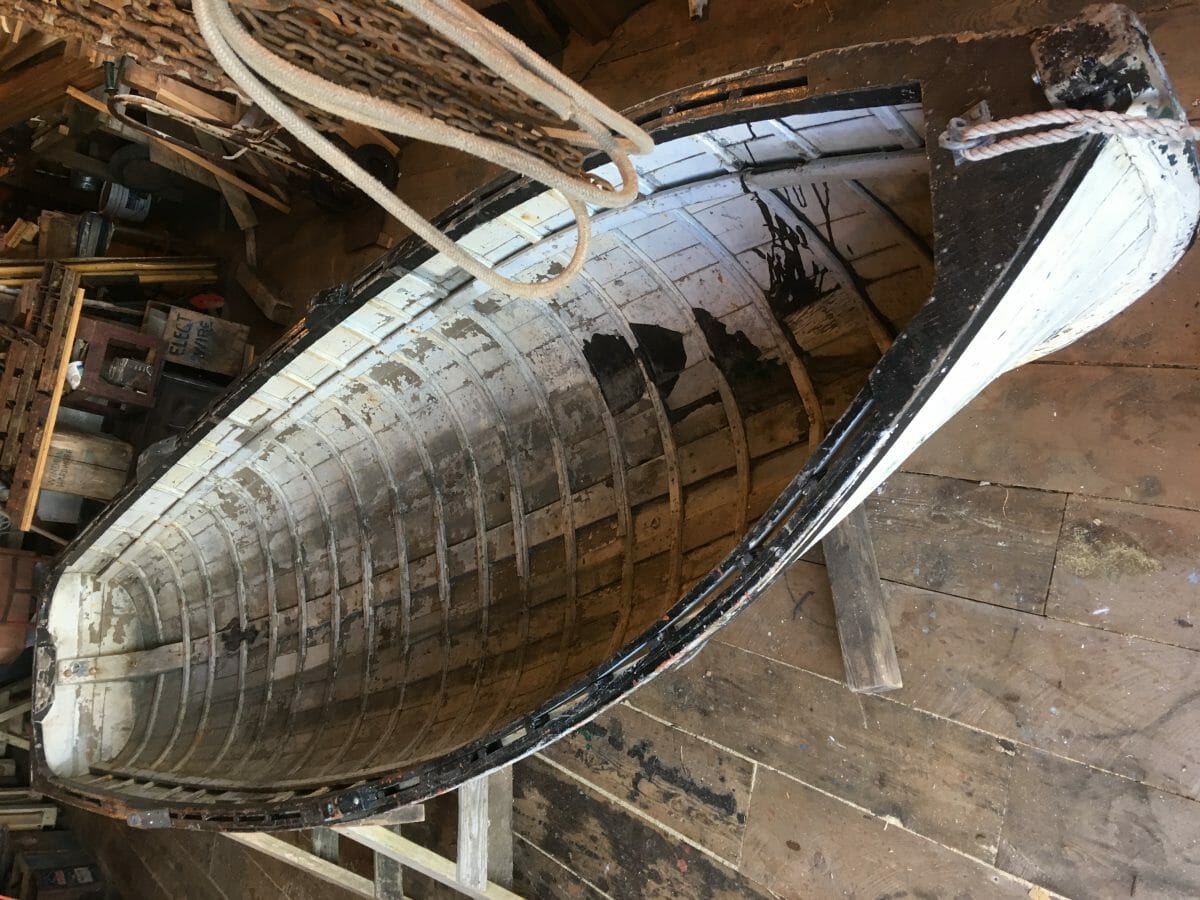
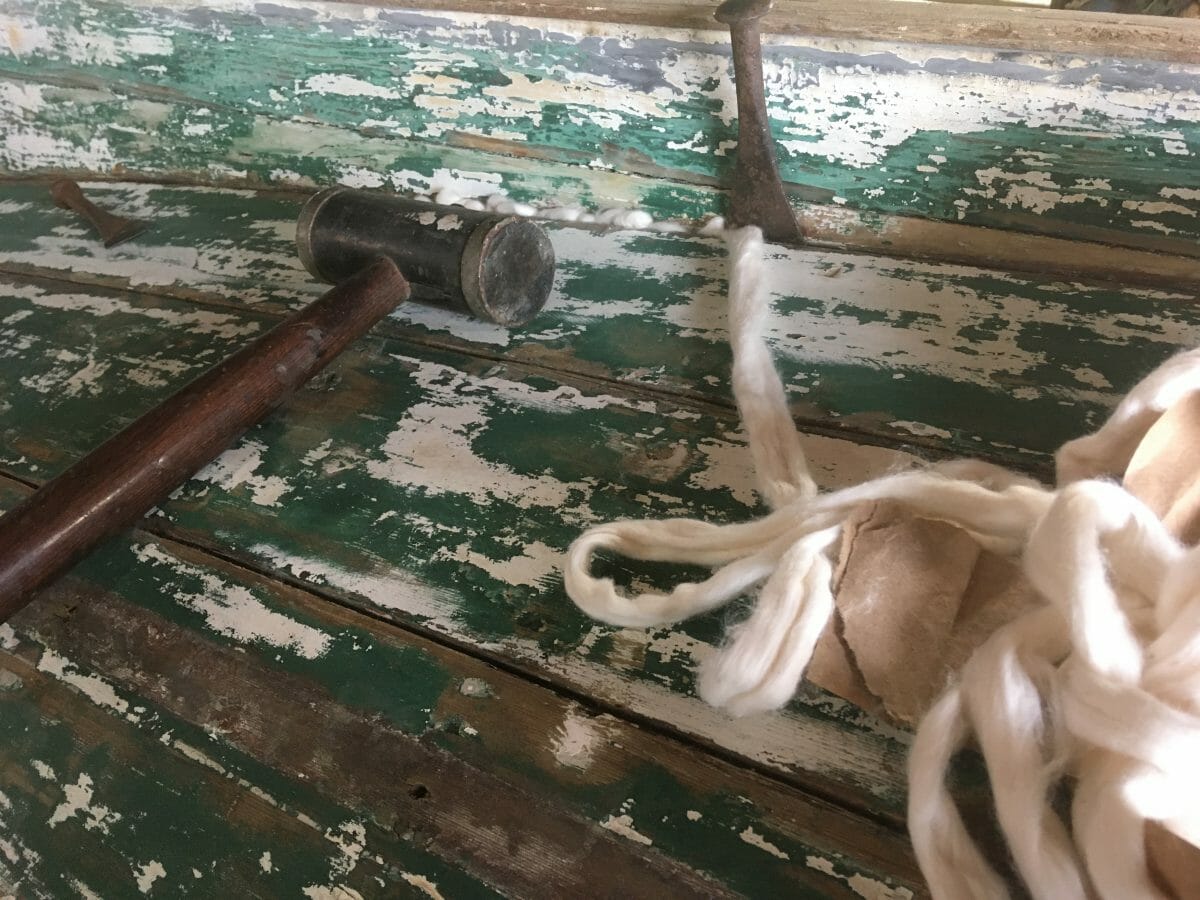
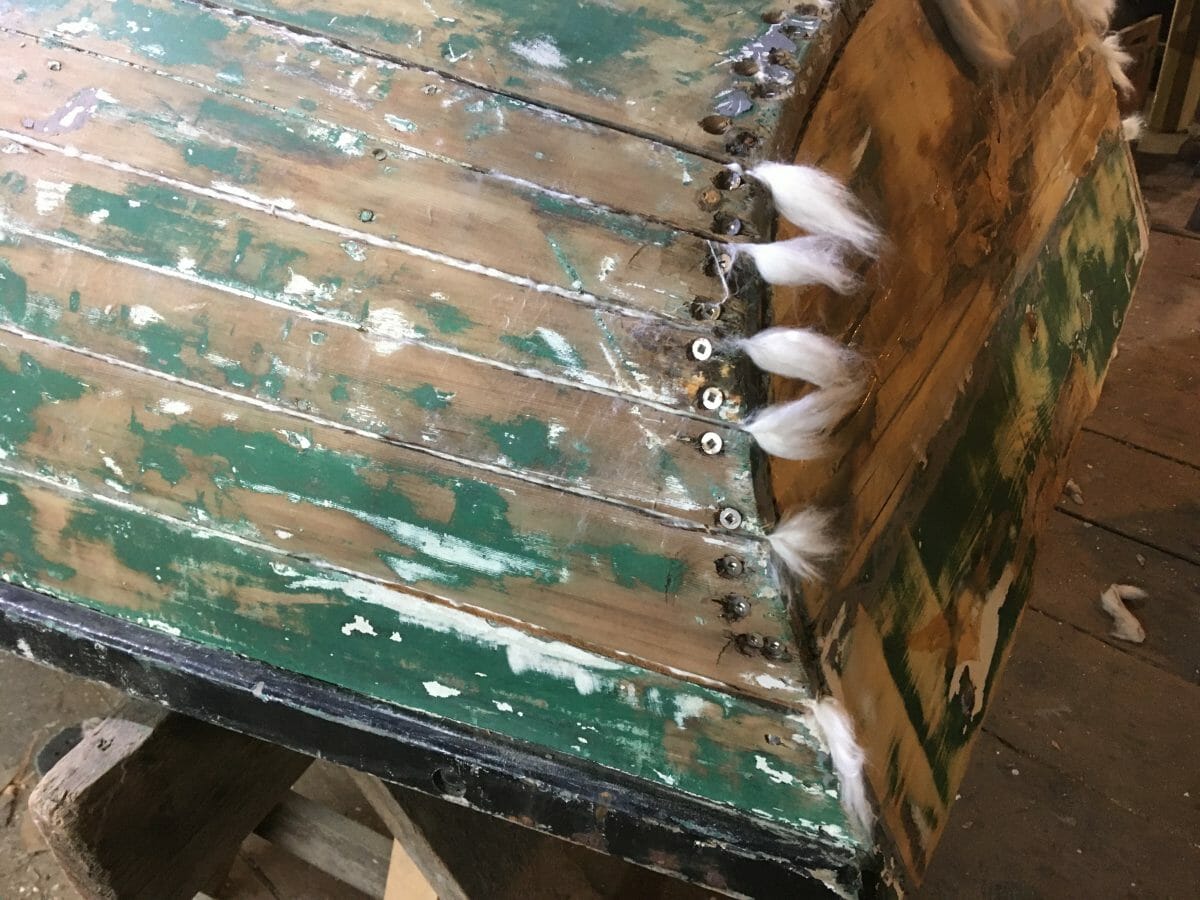
 First order of business is to remove the furniture (seat, etc.) flip it over and reef out the seams of old caulking–cotton in this case.
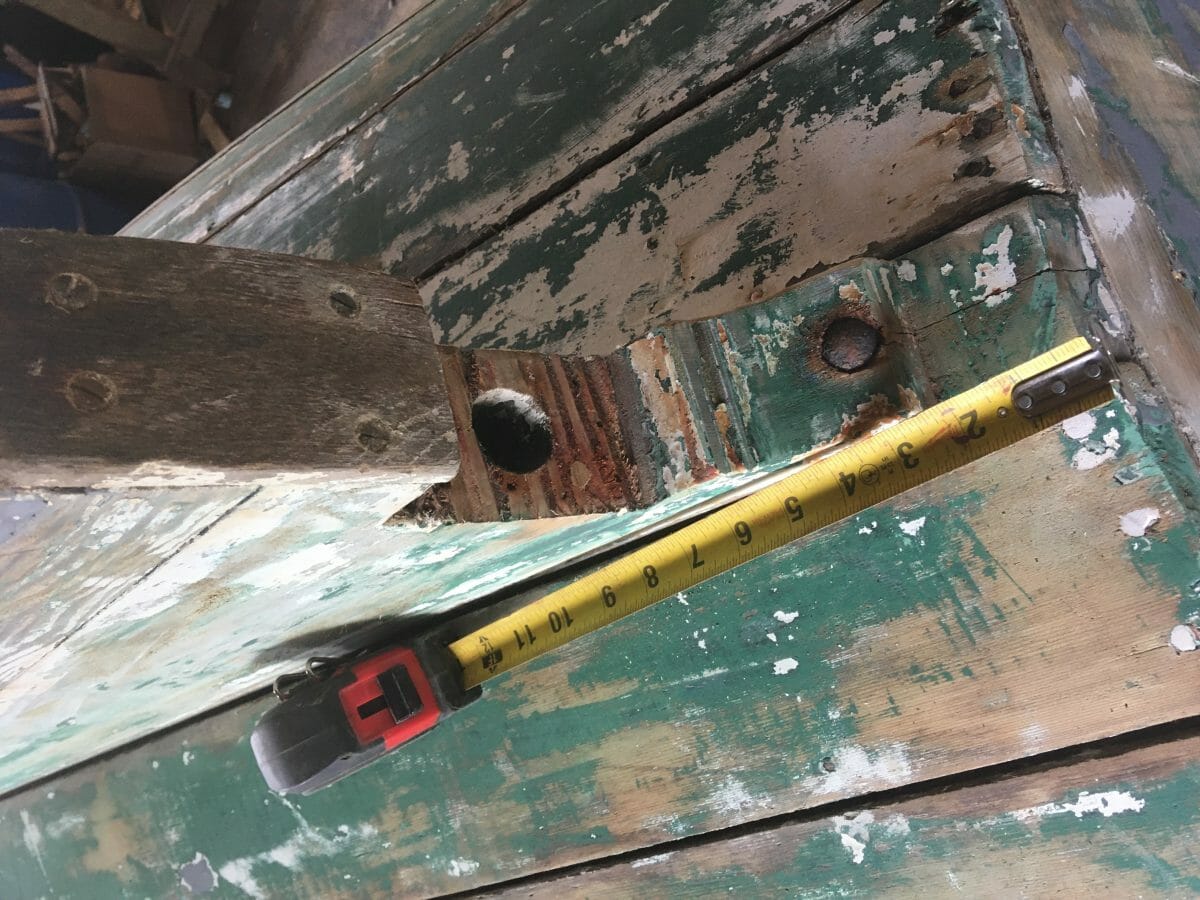
 The shaft log has been bored out–it was filled in with pitch (tar)
 This reefing iron is pretty large (built in Port Townsend for my tugboat which has 3″ thick planks) but it’s nicely tapered and worked fine. This old cotton was likely caulked in the 1920s. This boat is an excellent design and construction.
 Stripping begins. The planking is loose to the transom so the fasteners are pulled–it’s been refastened three times and there is not much wood left. I’m tempted to move the transom forward an inch and get into fresh wood but it would shorten the boat by that much. I use a new cordless Milwaukee orbital sander but it’s still tethered to my shop-vac. Nasty dust.
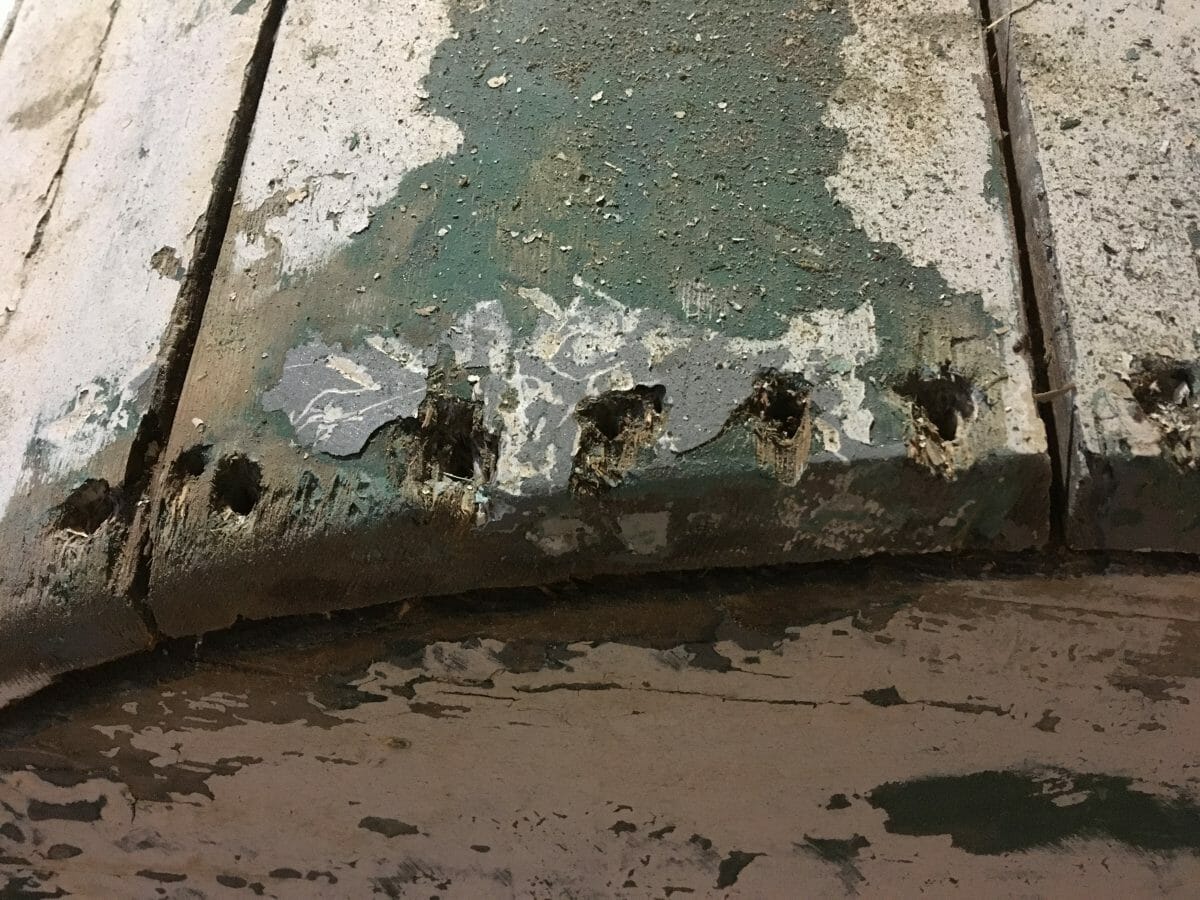 This is typically what I find–I removed three styles of fastenings here including a monstrous copper nail a quarter inch in diameter! For this round, I’ll use three new fasteners and plug the rest with oak wooden dowels. Then I’ll caulk everything. I’ll use stainless, square drives about 2″ in length to get into newer wood. Fortunately, there is no rot on this boat–it’s red cedar planking on oak frames.
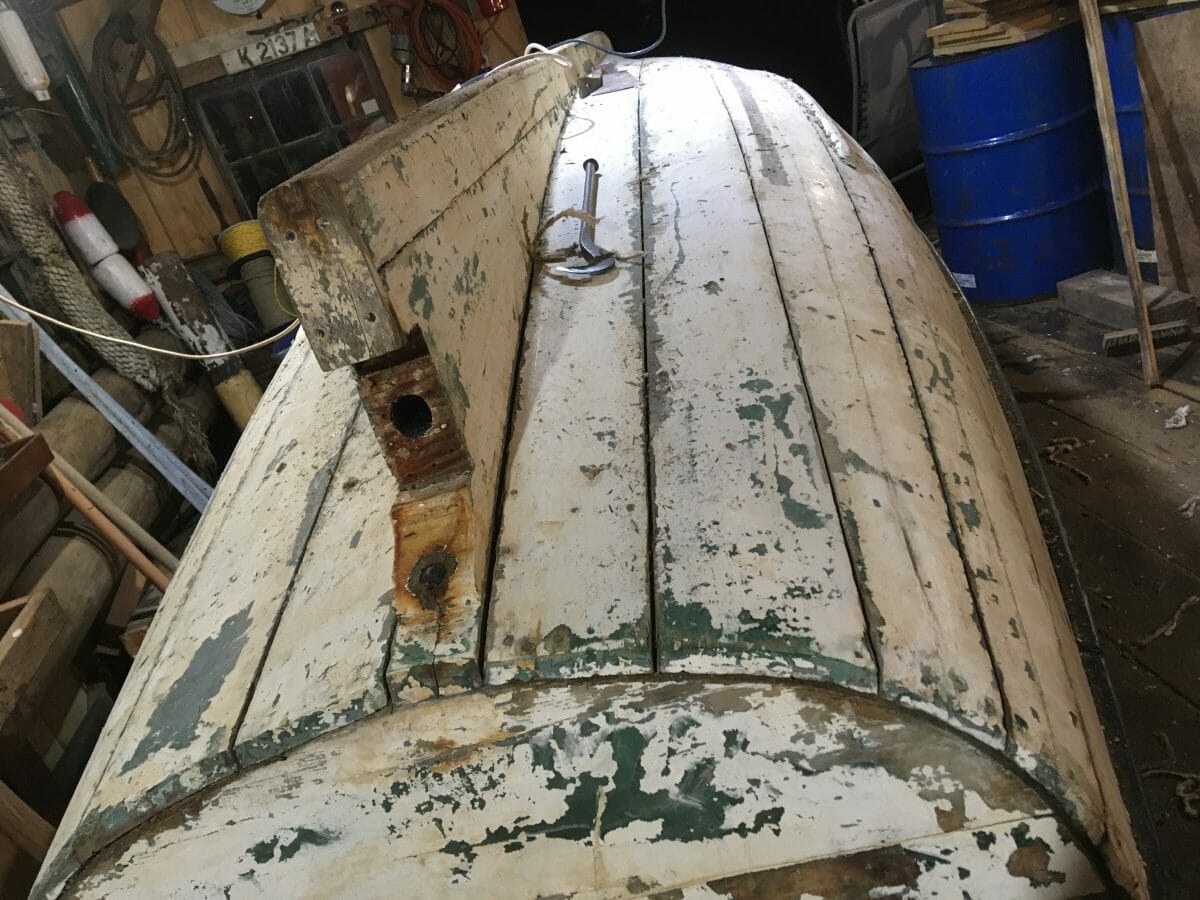
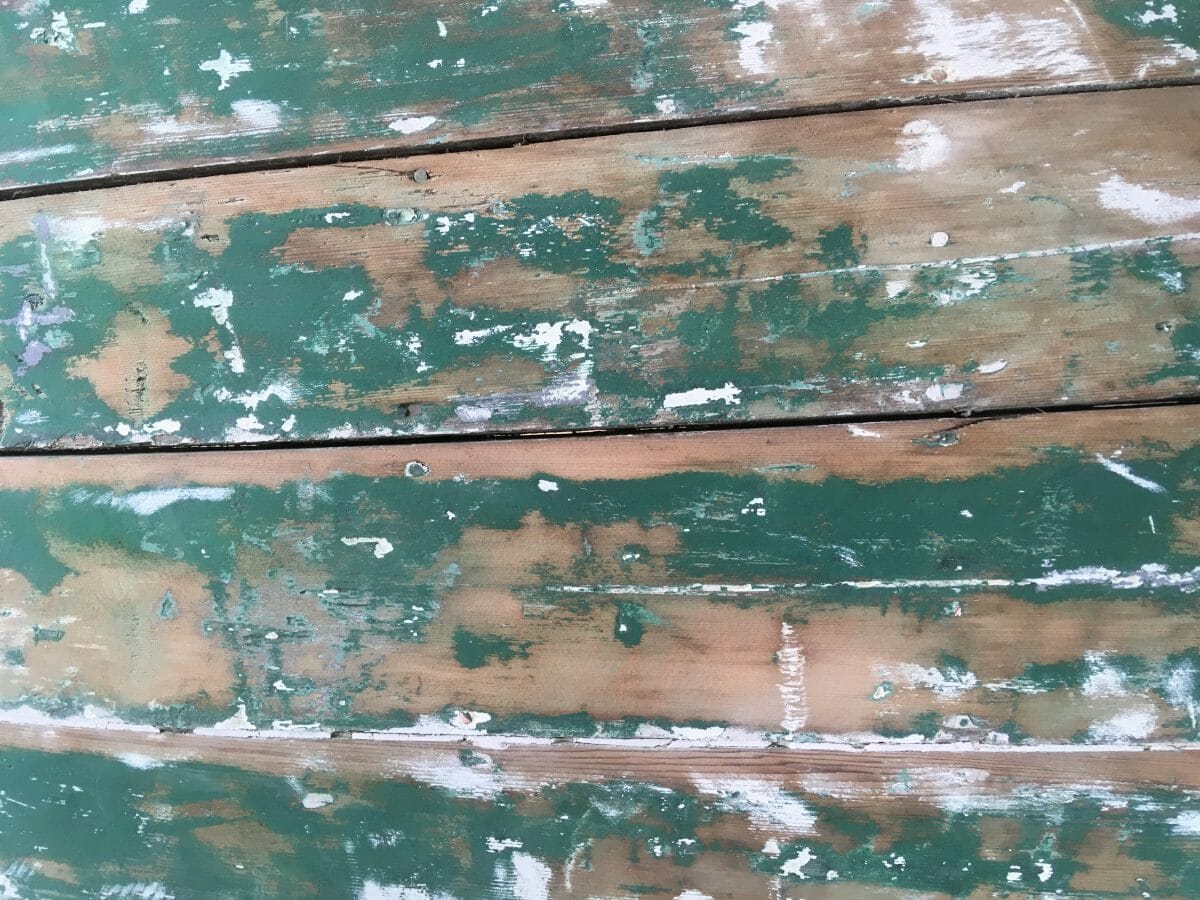
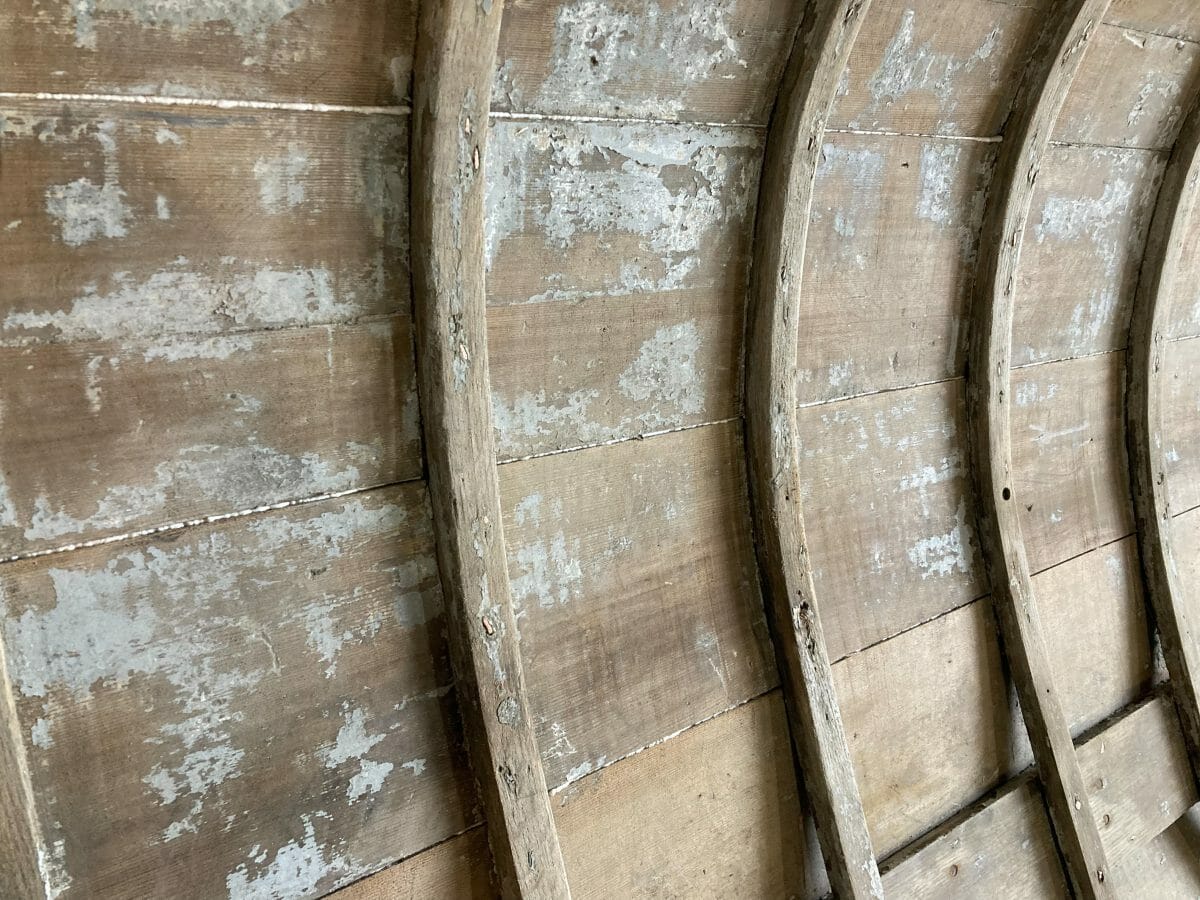
 Note what appears to be a crack in two planks–this is really a cut made in the plank that runs 2/3rds the length of the boat, then stops. I have never seen this but it appears it was designed into the construction to make the planks fit better at the chine of the boat. Here is where it terminates–about three feet short of the bowstem:
 Never have seen this type of plank and caulking will be a challenge….
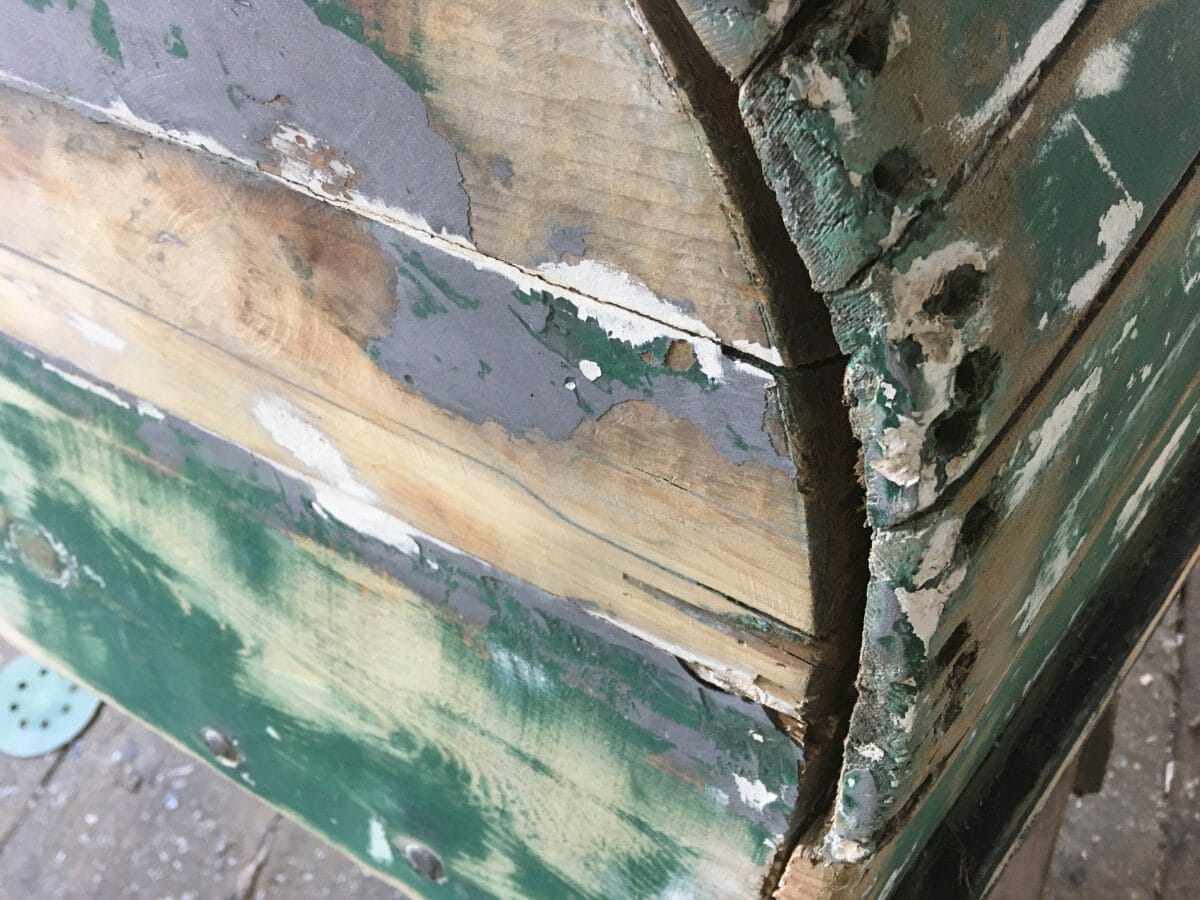 The port-side is worse–this is the most vulnerable part of any boat.
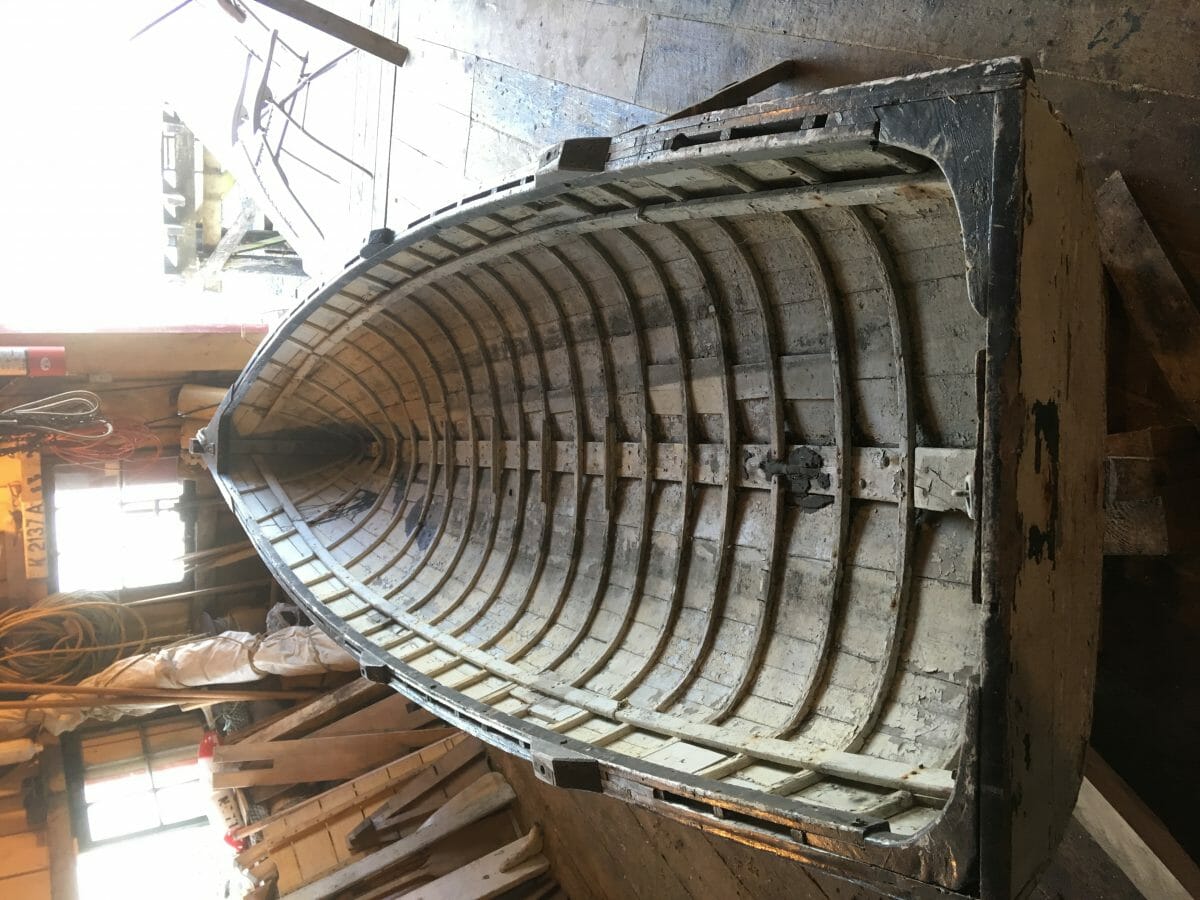
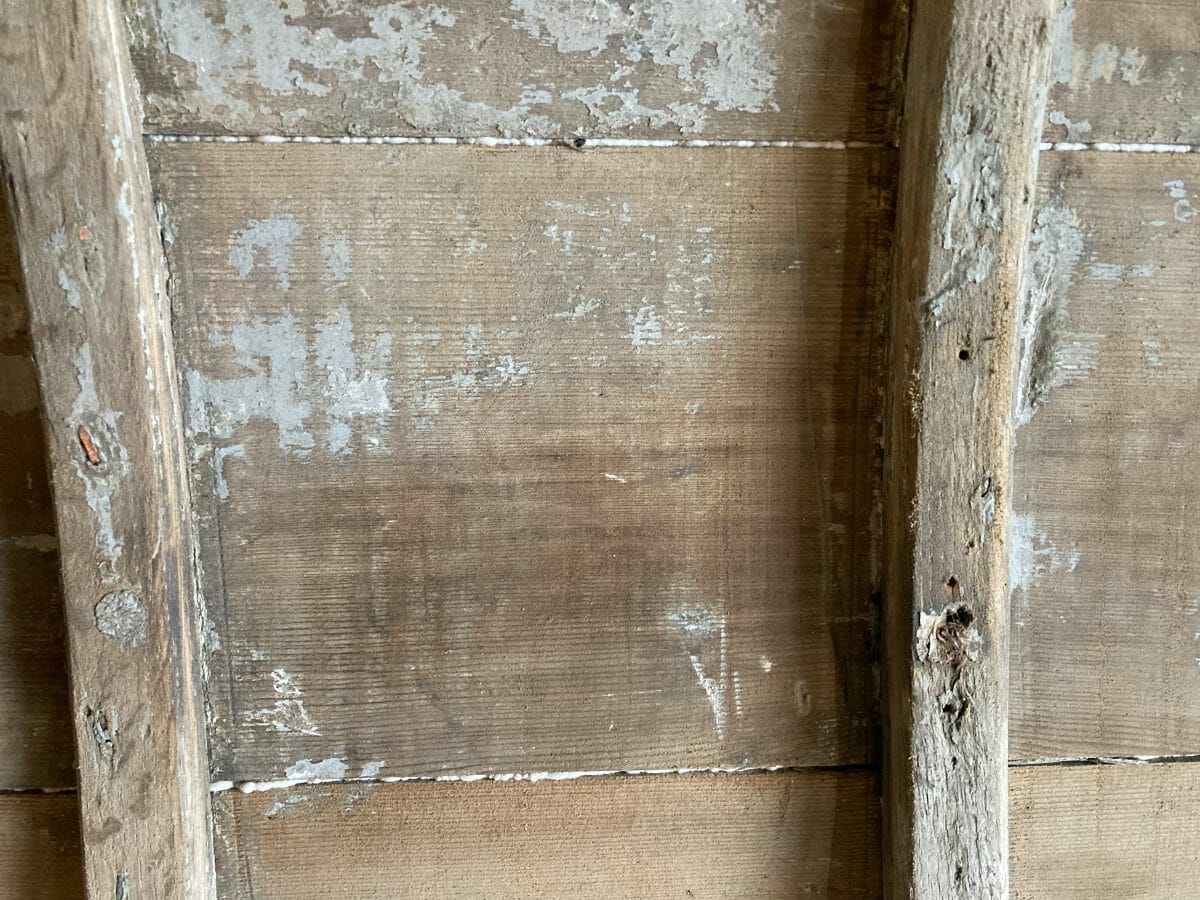
 Finally stripped–now the work begins with the interior. I’ll knock off the loose paint on the interior, prime and paint.
 This boat once had an engine–this shaft-log was pitched (tarred) up so I bored it out and am looking for a small marine engine: An Atlantic, Acadia or East Hope in the 5hp range. Gas, make or break. These engines are around but it’s the shafting, rudder, etc. that will be hard to find. Typically the propeller (wheel) diameter matches the outside of the diameter of the engine flywheel if it’s two bladed and the inside of the flywheel rim if it’s three bladed. I’m looking for a three bladed propeller about 10″ to 12″, I’m guessing. I’ve an old orchard pump engine which might do the trick.
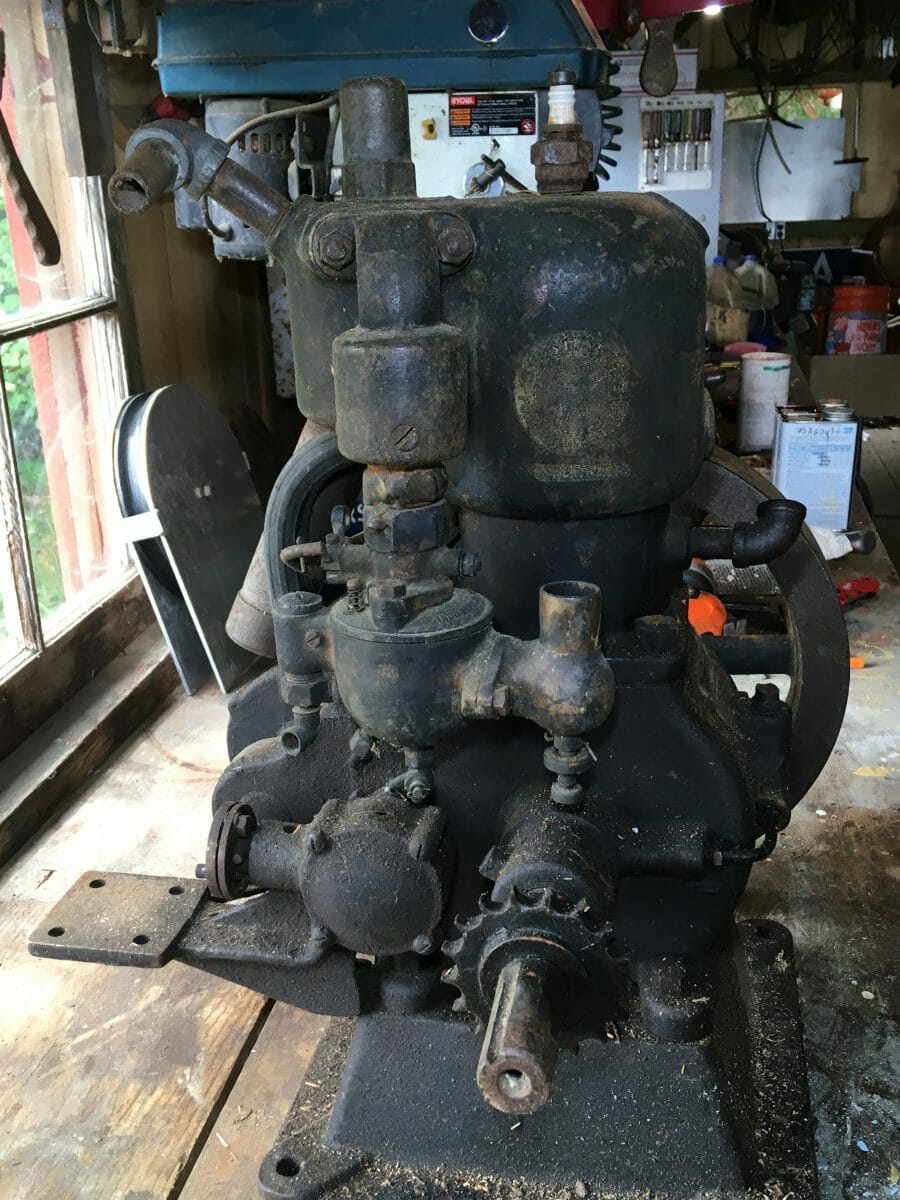
This is the engine I’ll put in the boat–to be named Leif. The engine is a Cushman with the 1911 patent, model C.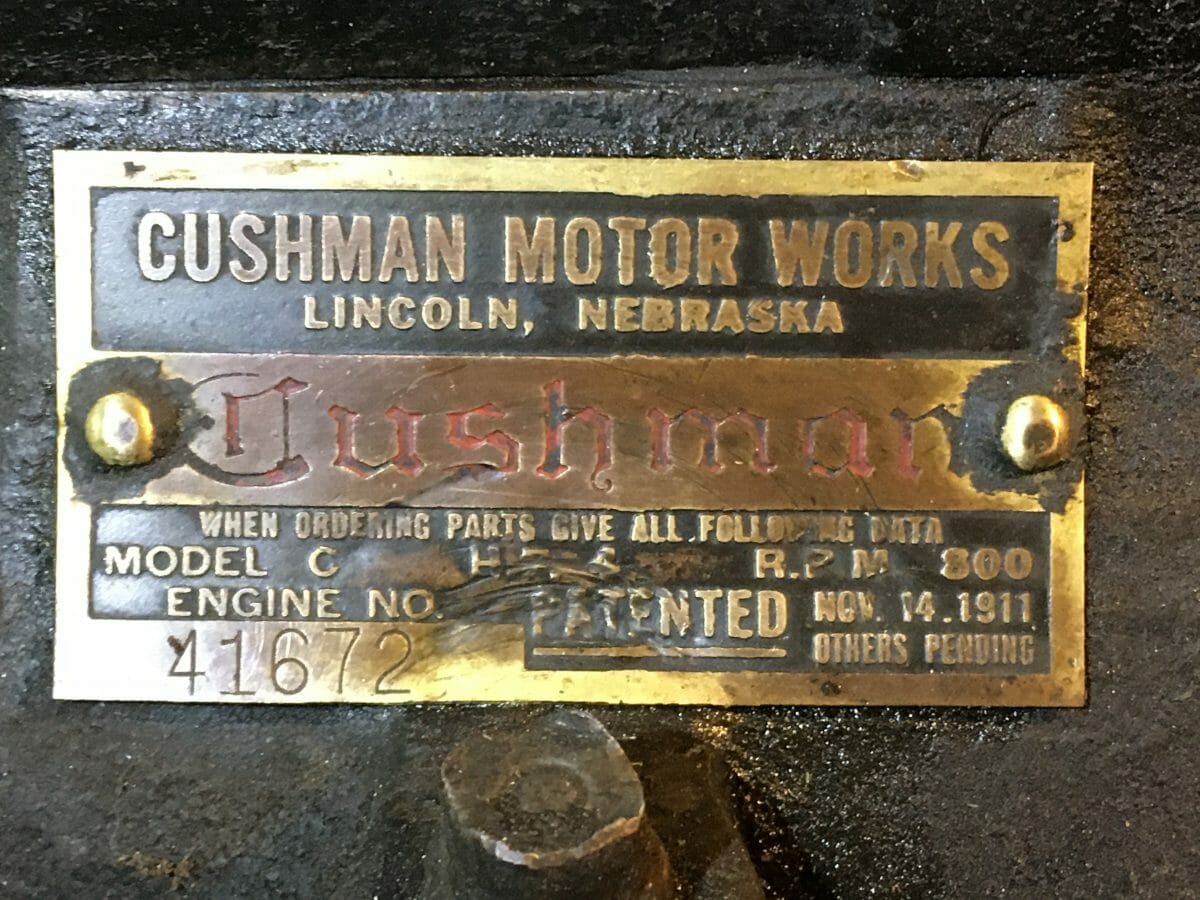
It was originally a pump engine in an orchard but this same model was designed for marine use. I’ll use salt-water cooling but perhaps add a keel cooler at a later date.
The carburetor is a Schebler Model D as far as I can tell.
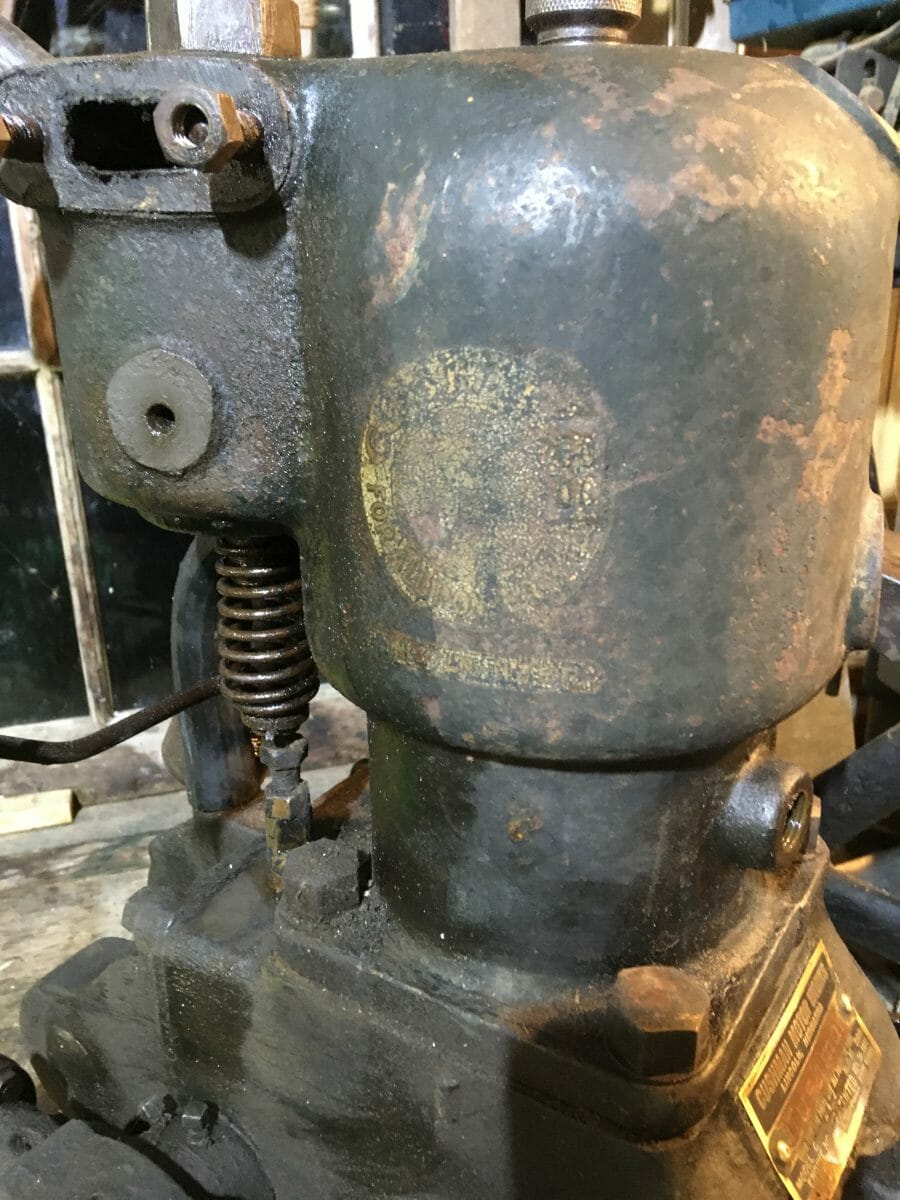
The old decal has faded but I found reproductions online so eventually this will get a paint job and new decal.
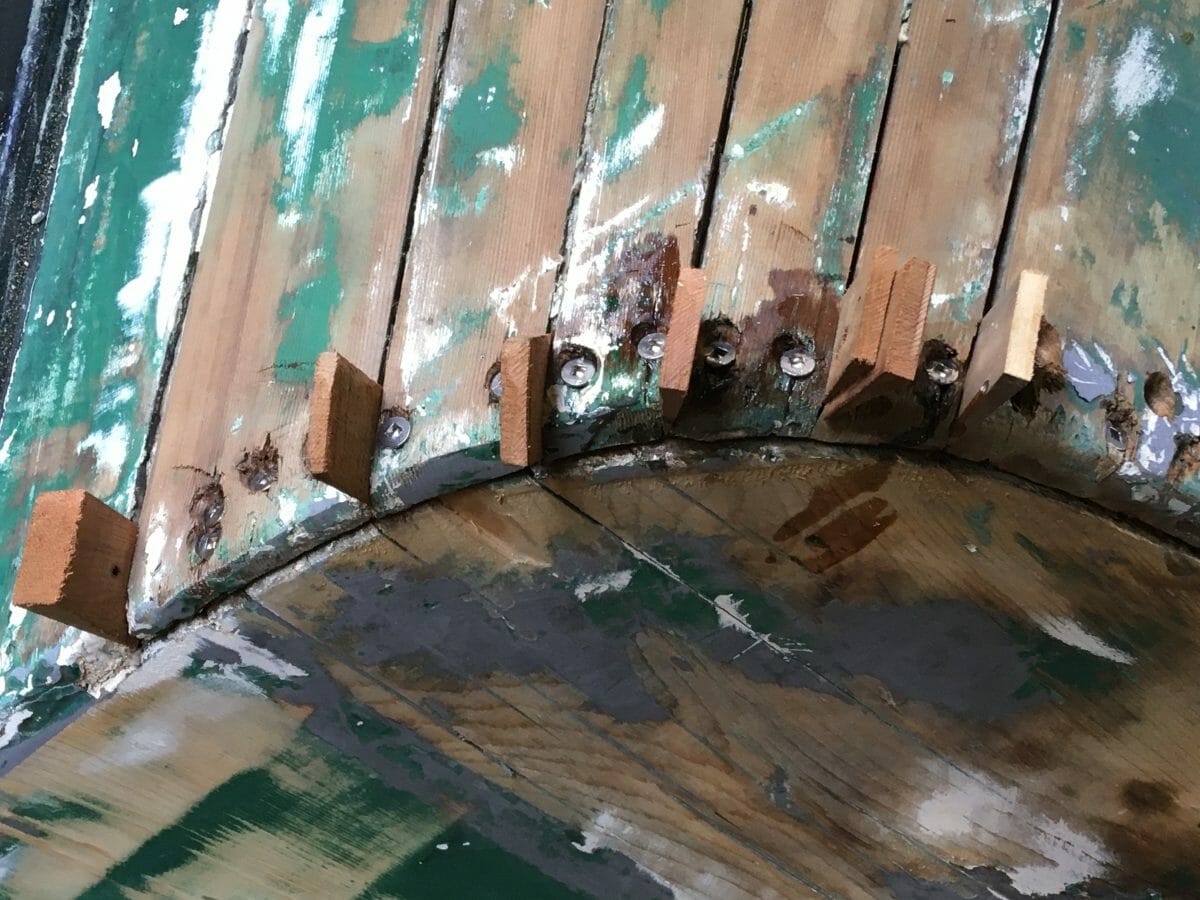
OK–back to the boat. To prevent further splitting of the hood ends, I insert red cedar wedges while I refasten each plank.
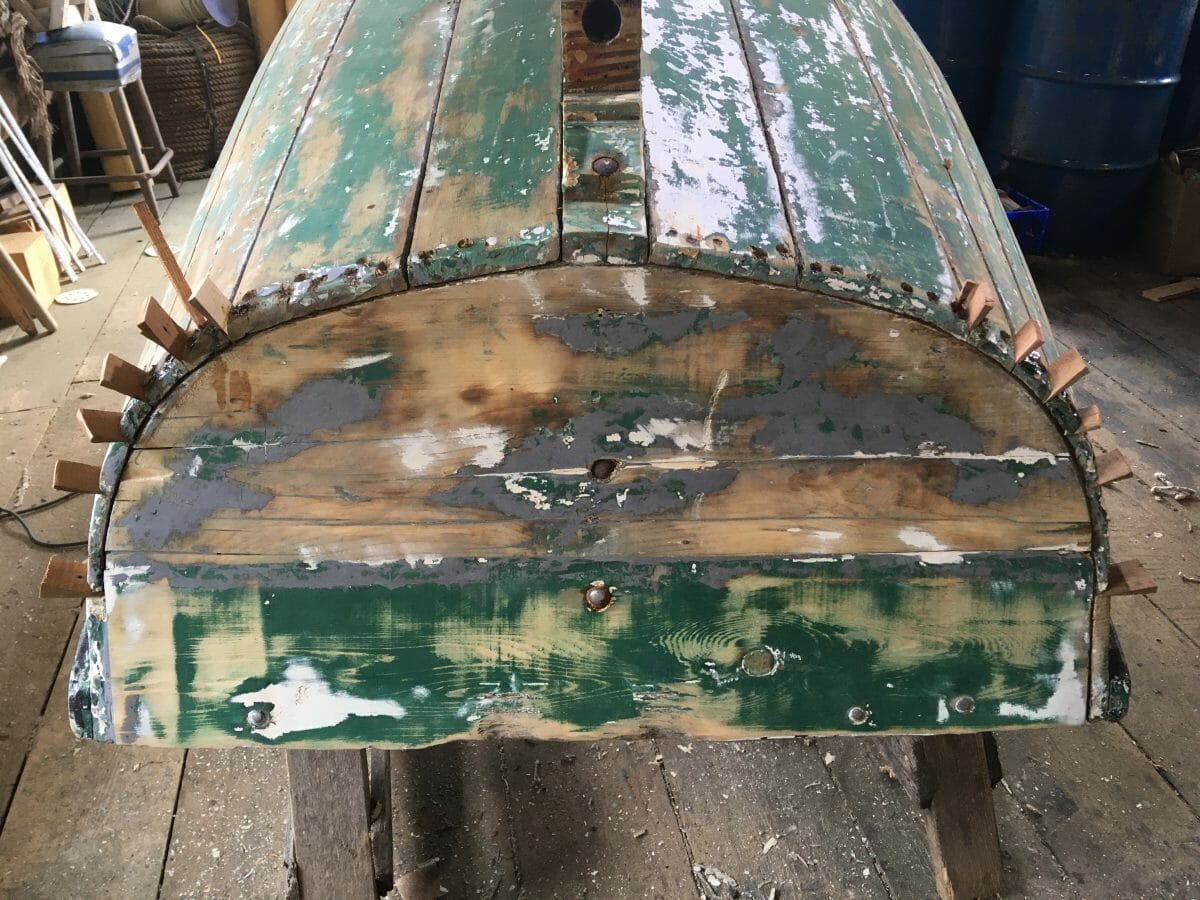
It’s actually pretty stable and with a little epoxy fill, will restore OK.
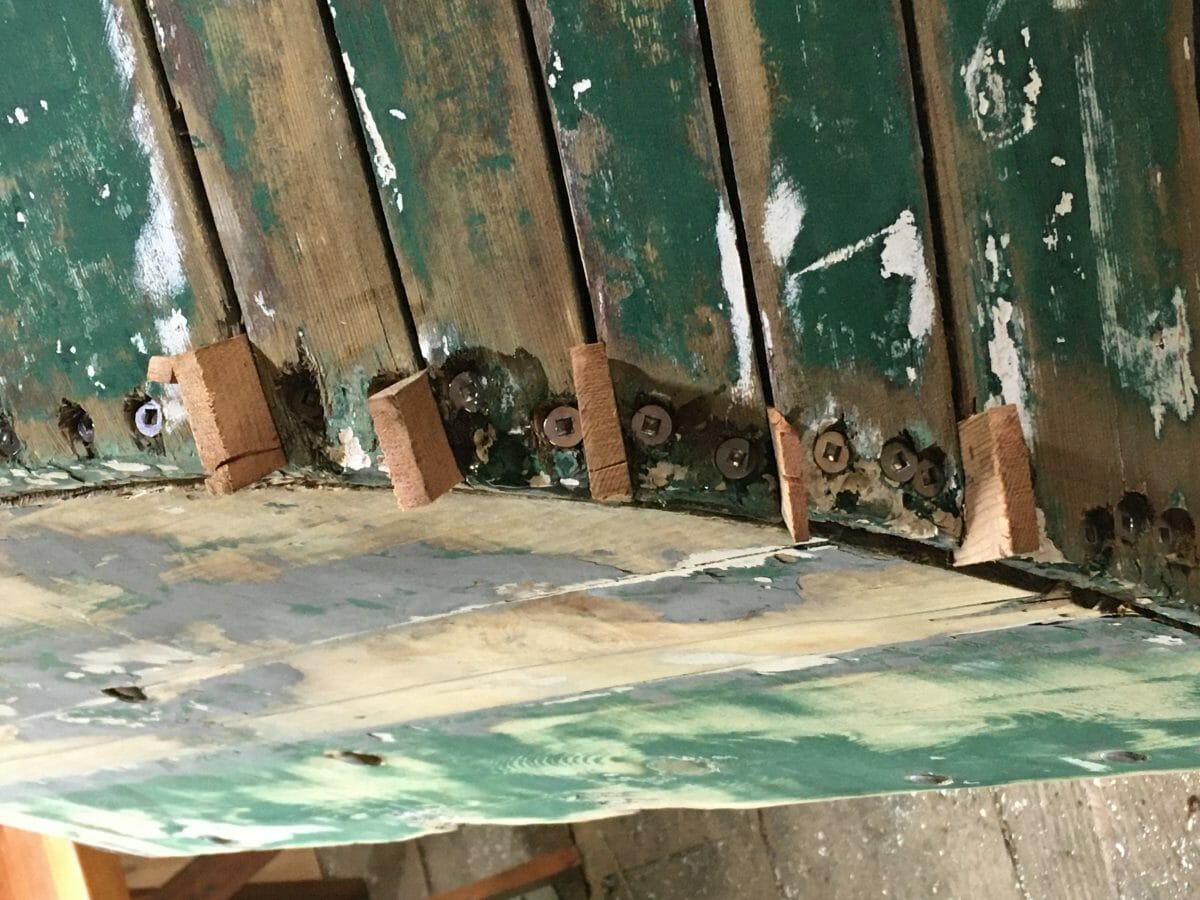
I use square drive stainless 1-1/2″ fasteners. The planks are 5/8″ thick red cedar.

Meanwhile…..I flip the boat vertically–I prefer to strip the interior this way rolling it 180 for the other half.
Garboard is first.
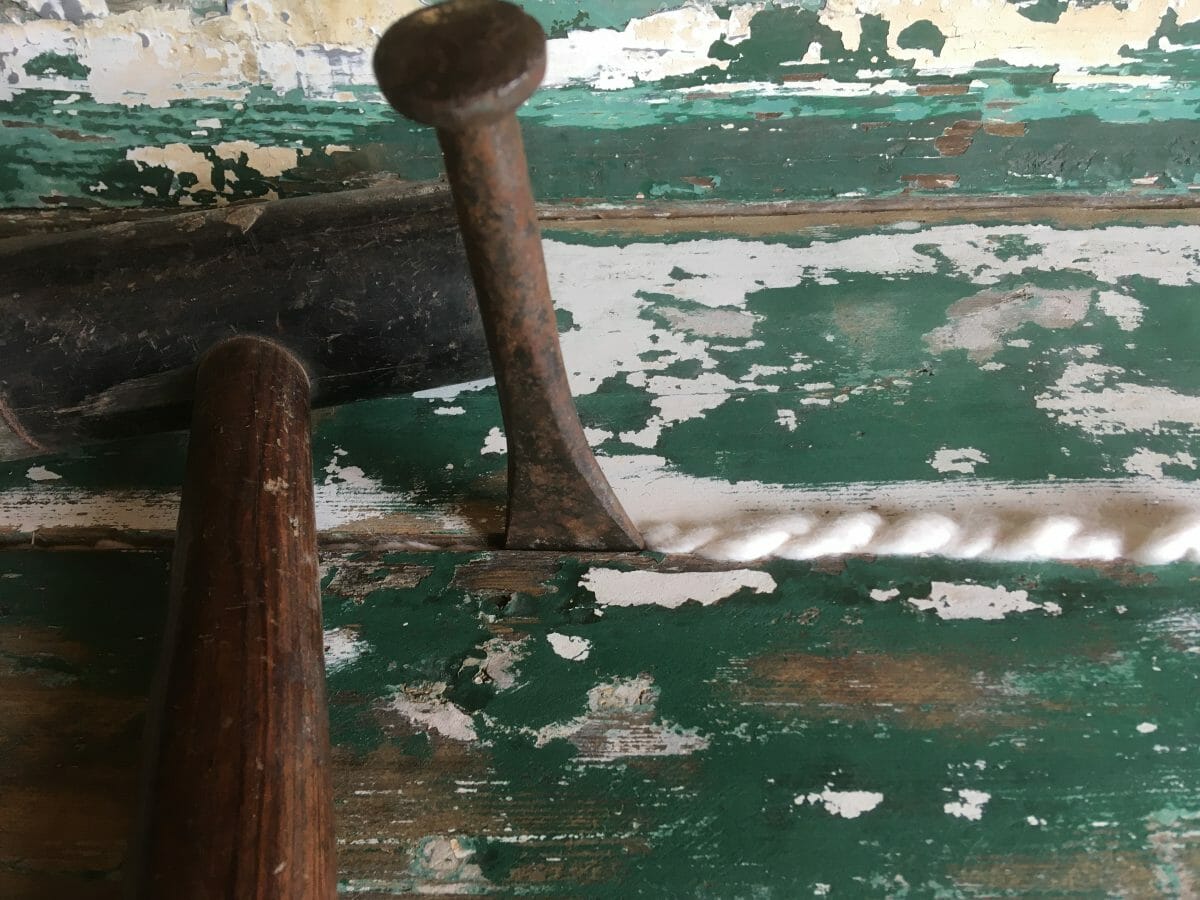
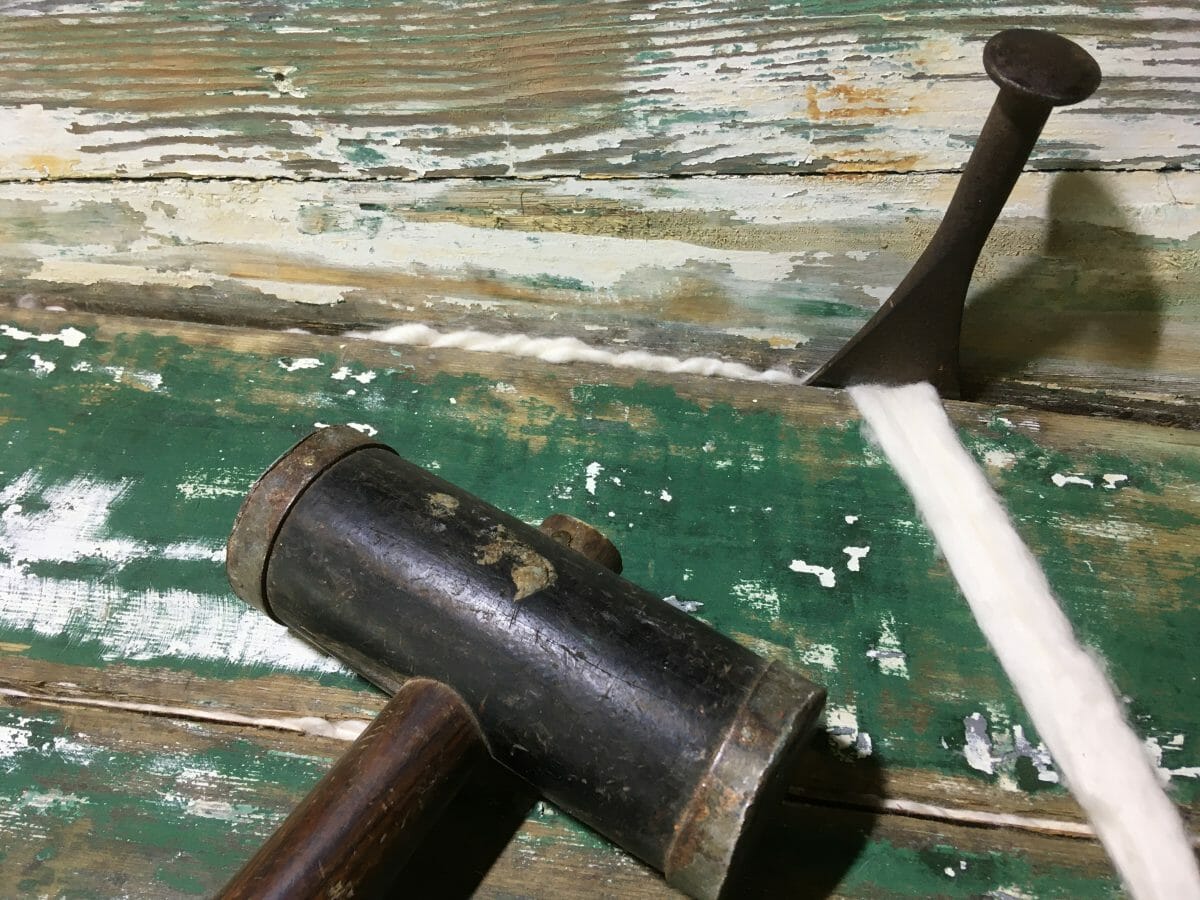
Because the planks have shrunk a bit and some internal damage has occurred, I caulk carefully with one seam of cotton; first threaded in, then set with a wider iron.
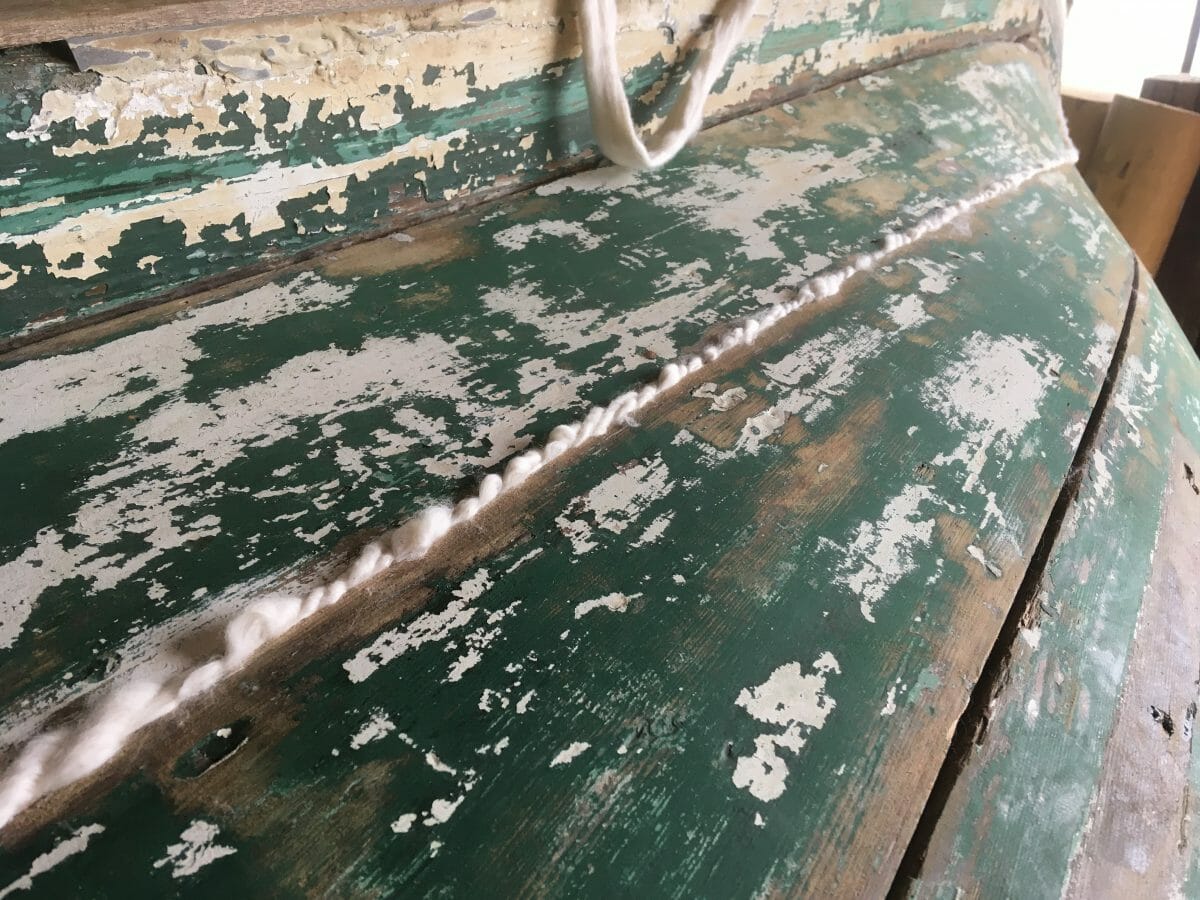
And work my way to the gunnel. Not all seams are recaulked.
The hull hardens up and makes a nice ring when the cotton is set.
Yahrrrrrr!
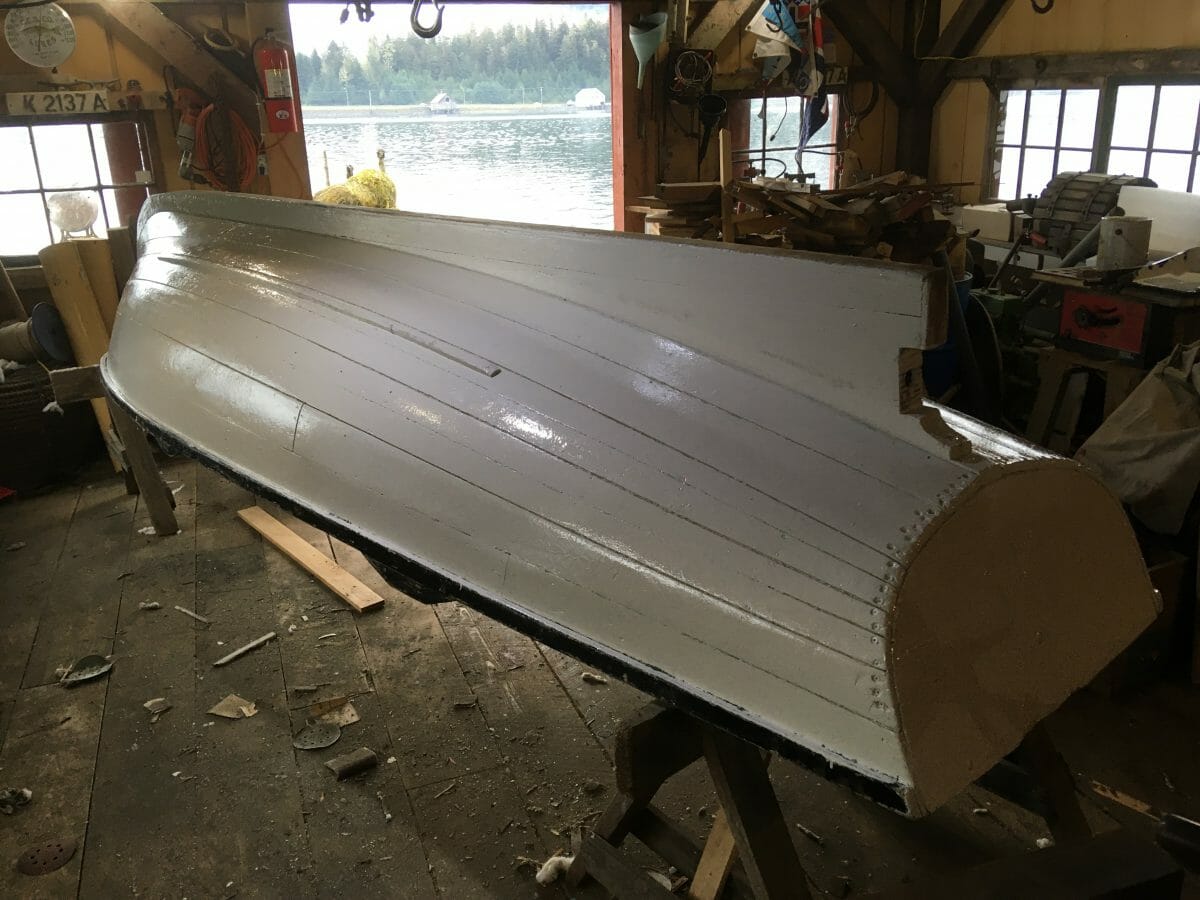
After everything is stripped, reefed, vacuumed, and refastened, and caulked,I paint a coat of prime.
The next step is to repair the fastening holes. They are countersunk to gain more firm wood–I followed each original hole and likely a second refastening adding just a few new fasteners. I initially used Interlux’s seam compound but it aabsolutely won’t set (it’s over 5 years old–and as fluffy as cake-frosting); so I reef it out with a toothbrush and paint thinner and do it all over–with a second seam compound which also is too soft. Finally I resort to epoxy based filler and seam compound only in the seams–where it belongs!
Below water uses a different material.
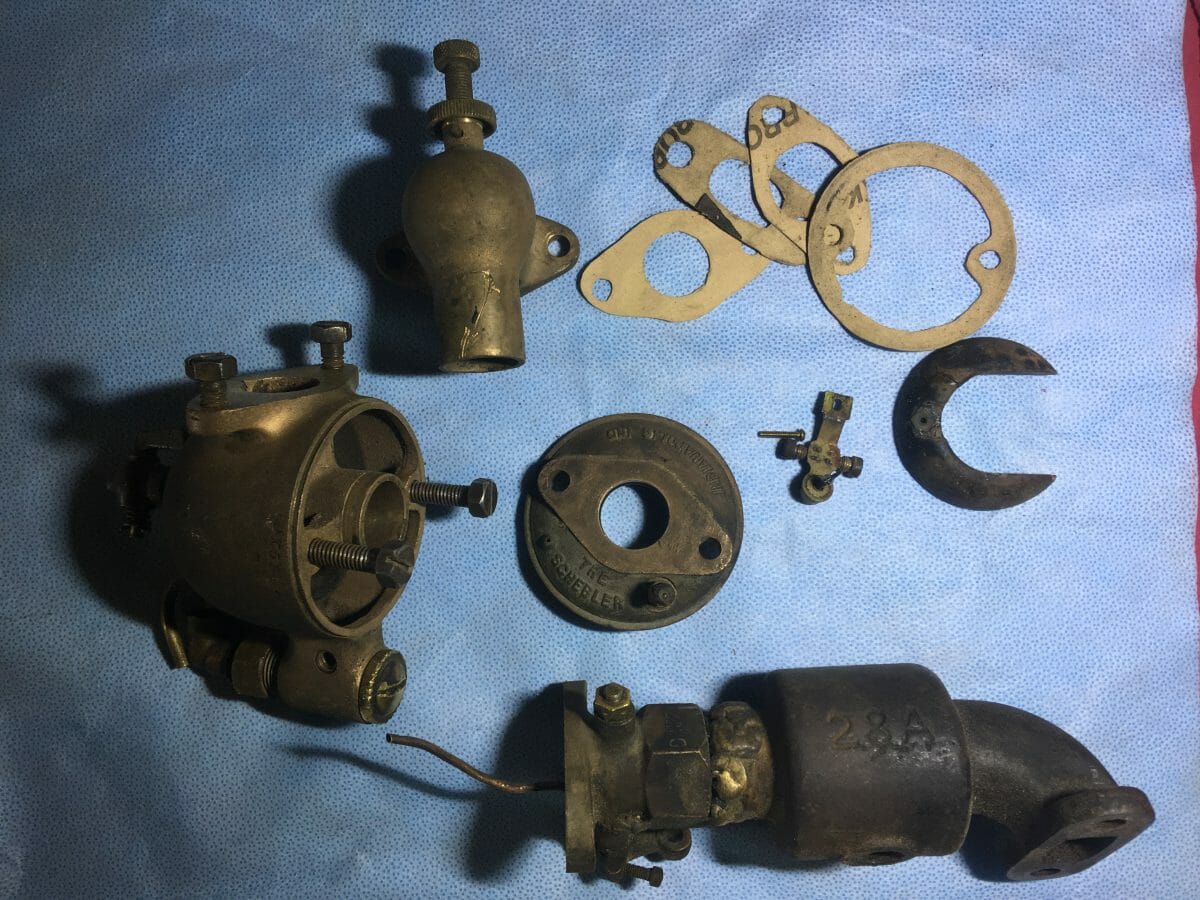
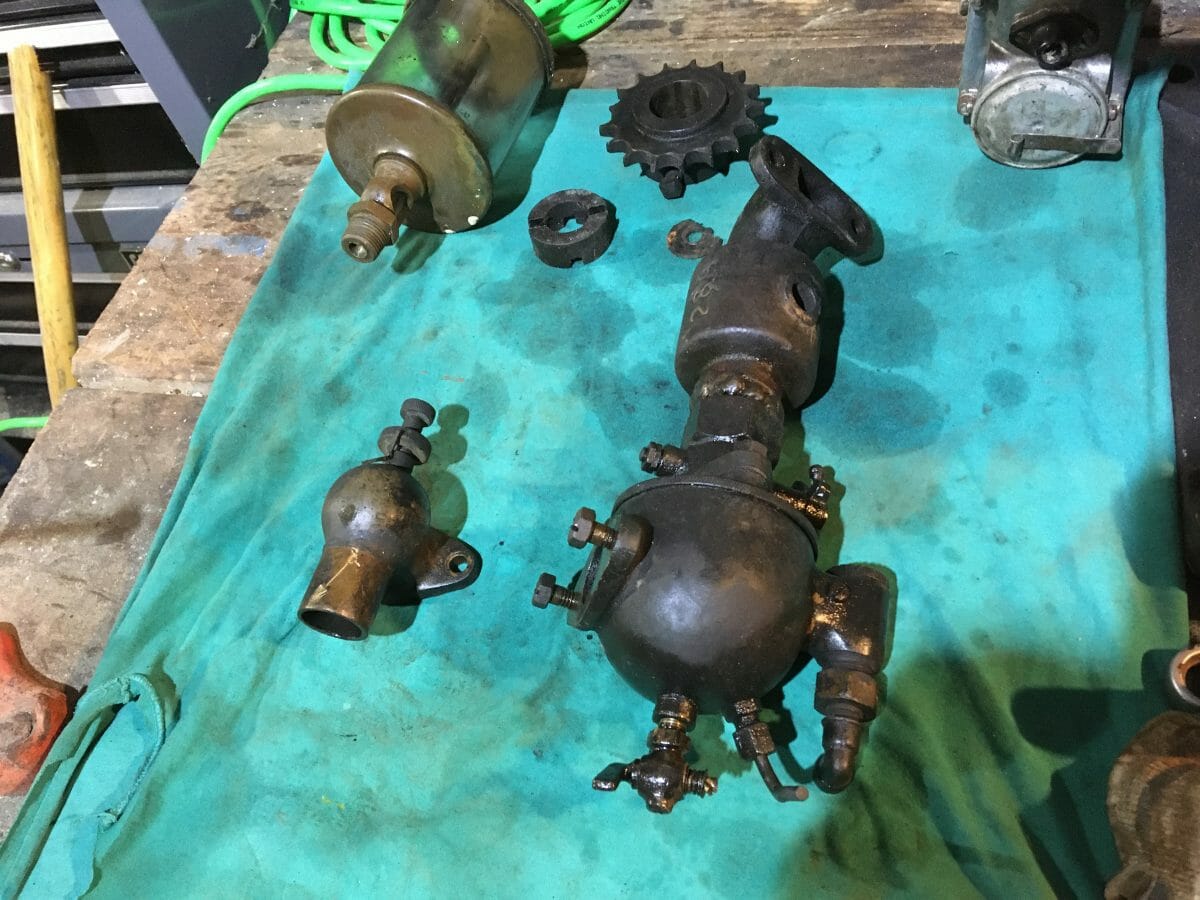
Meanwhile, in the mechanical room, it’s time to disassemble the carburetor. All new gaskets and threw in a few o-rings and bought on ebay some #4 X 36 brass screws–needing only one–to attach the carburetor float to the rocker arm. All set to be reassembled.
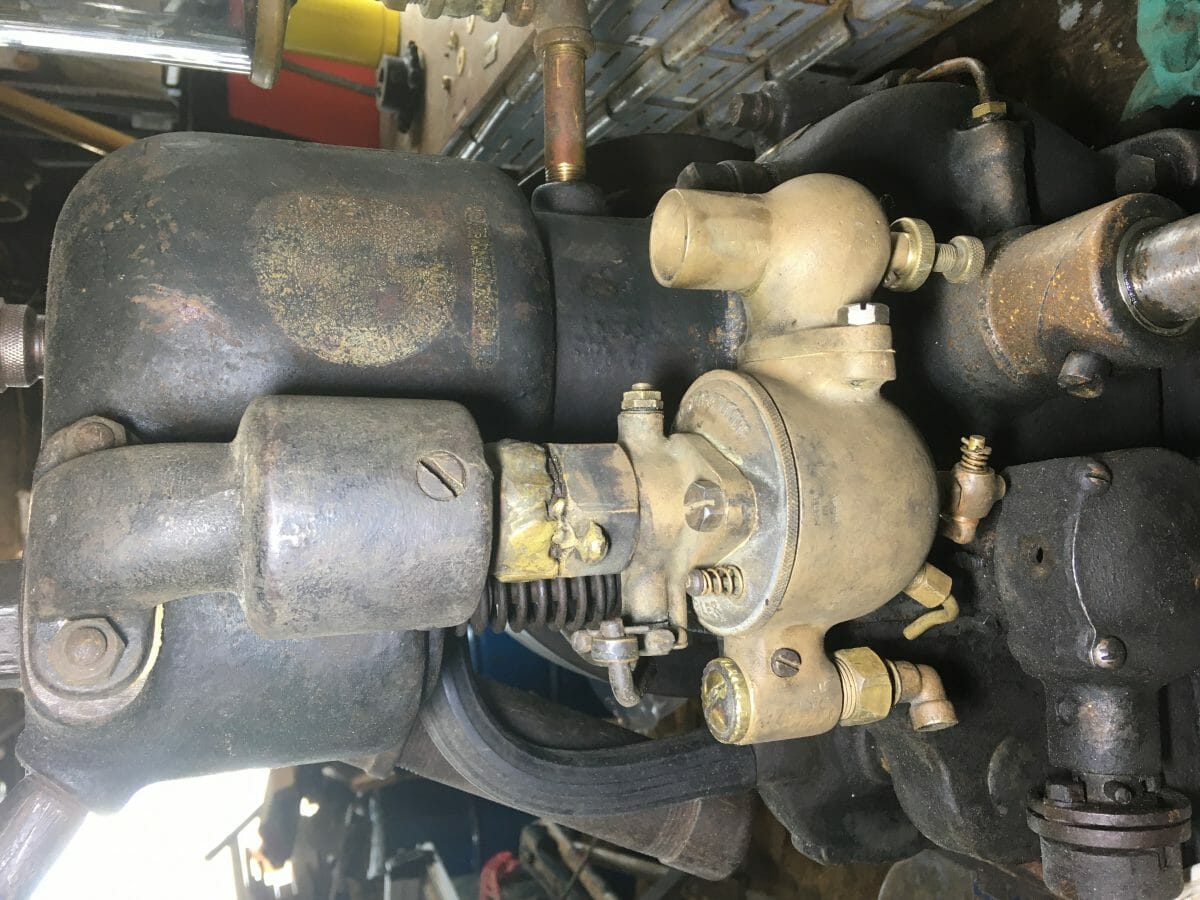
Back on the engine. I’ll reverse the air-intake (it needs a new gasket also).
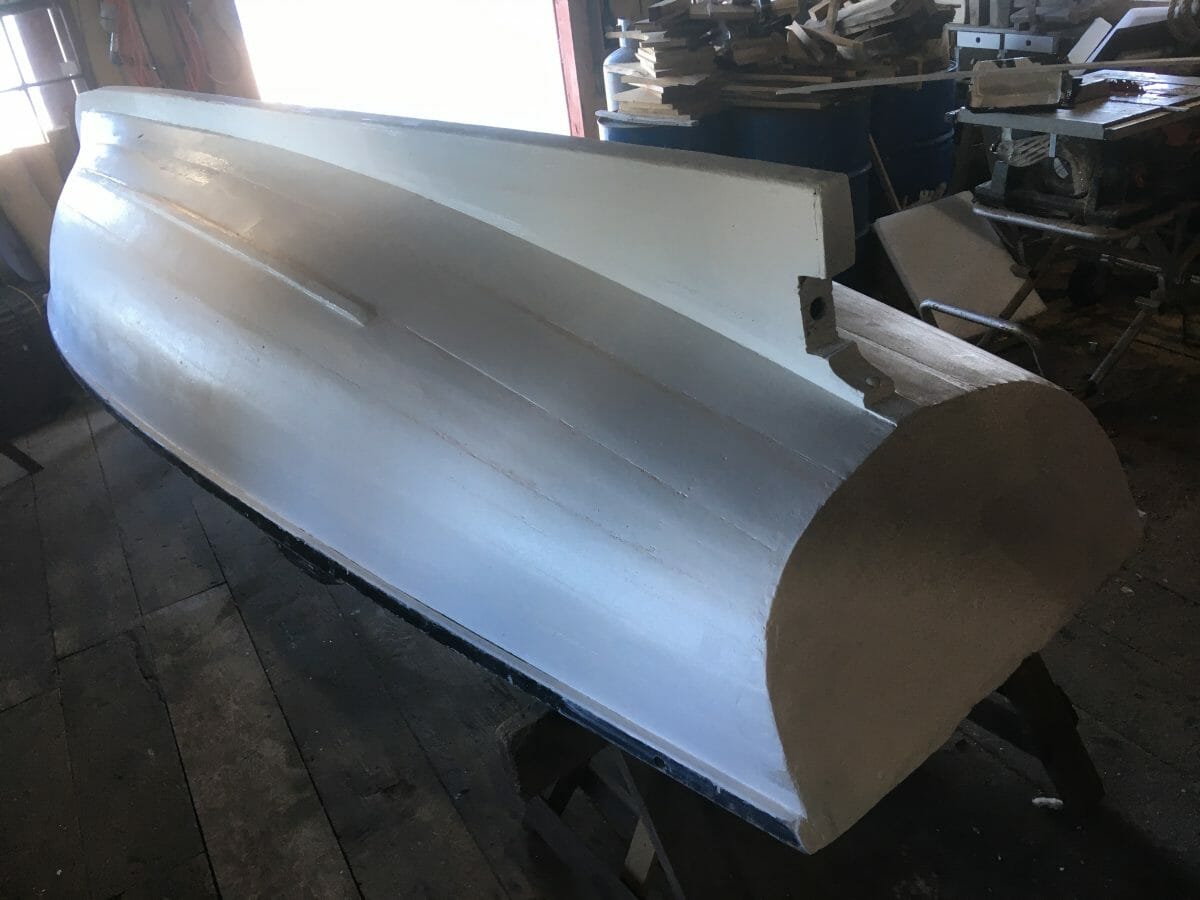
OK–all the paint is dry and I do aa couple rounds with fairing compound and do a final coat of prime, after a 80 grit sand. I would have used bottom paint, but I’ll add bottom paint next year when the engine has been installed and I refloat the boat to get the actual waterline. Nothing worse than a crooked waterline.

Here’s that carburetor intake float. There are two apertures in this housing but one has a vacuum actuated intake. I find an old rubber boot and cut and taper this washer (it was originally a domed washer)……
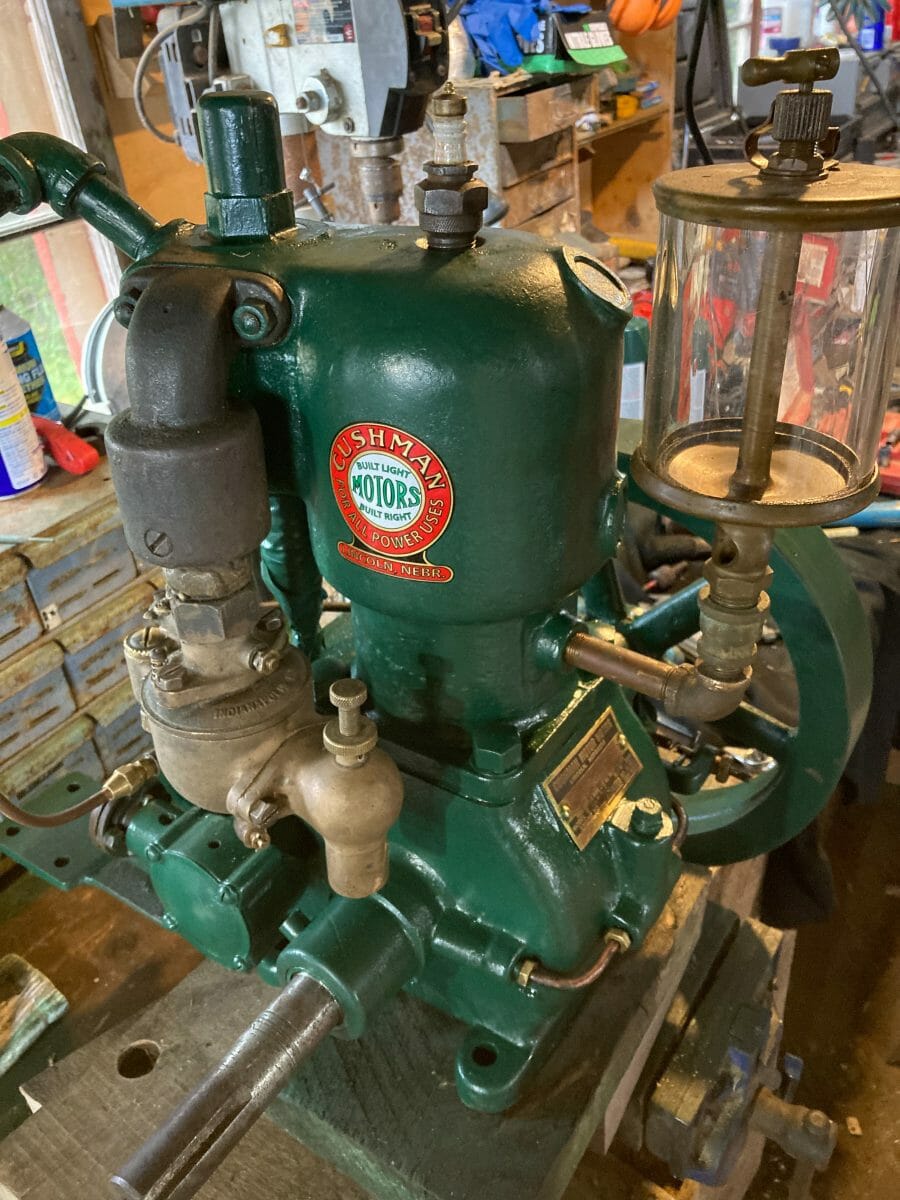
The 1911 Cushman (patent date) gas engine is cleaned up; carburetor rebuilt and magneto stuck at our local post office. When I get the magneto, gas tank installed, she’ll be ready to go. The trick then is to design an engine bed to align up with the shaft-log…… and gain support on these tiny frames:
I’m not a caulker, but I have to say that 95% of the caulking seams went very well.
The boat has dried out so when it’s relaunched, these seams will become very tight again. I was surprised at the quality of construction–these Davis folks knew how to build boats…..
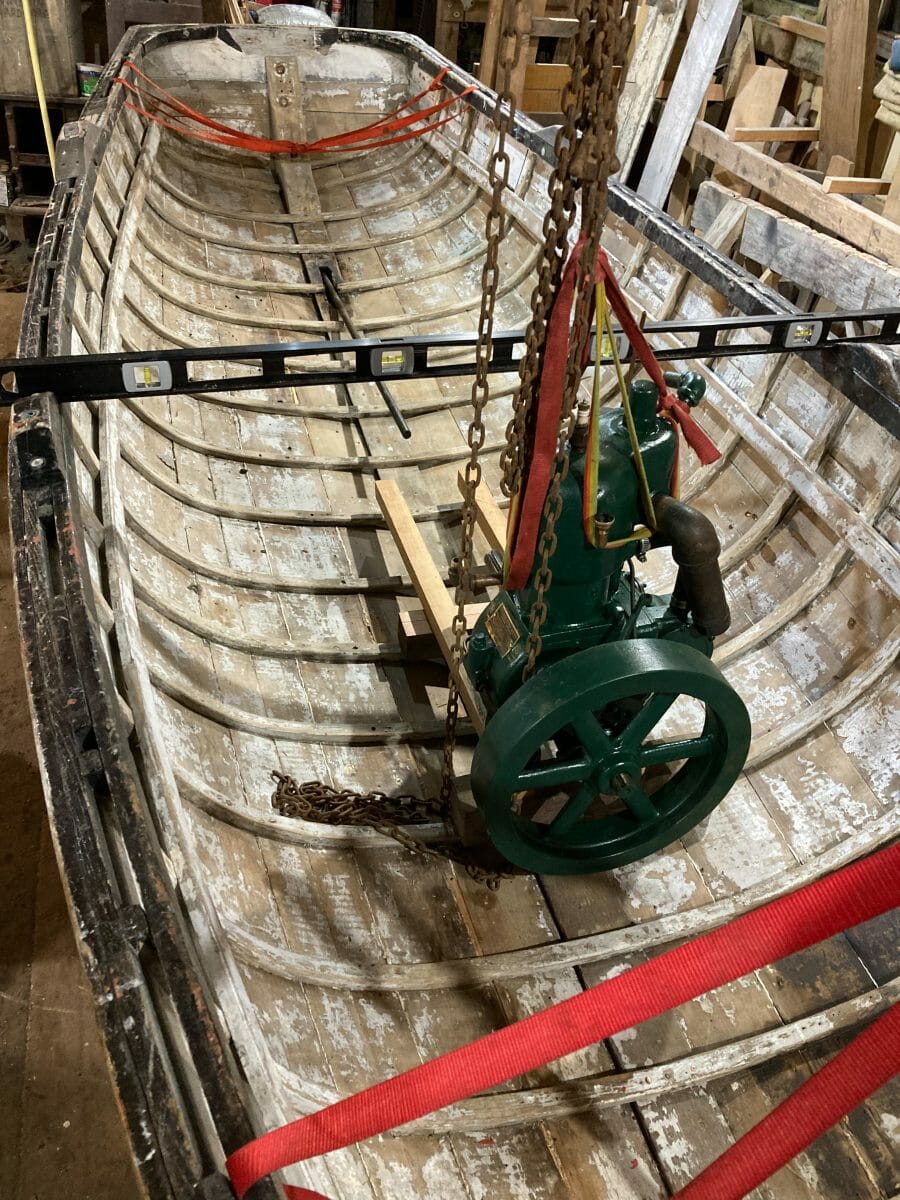
Here’s a final mock-up where the engine must be to align with the shaft-log allowing about half inch of clearance for the flywheel. I’ll snoop around for a propeller, rudder, shafting, etc.
Stay tuned…..